

Estimated time: 5 minutes. You will need Huntress Admin access.
Prerequisites
- Access to your Huntress Dashboard as an admin
- A Clarion workspace with the Huntress integration wizard open
Step 1 — Generate API Credentials in Huntress
- In the Huntress dashboard, click the menu button in the upper-right corner.
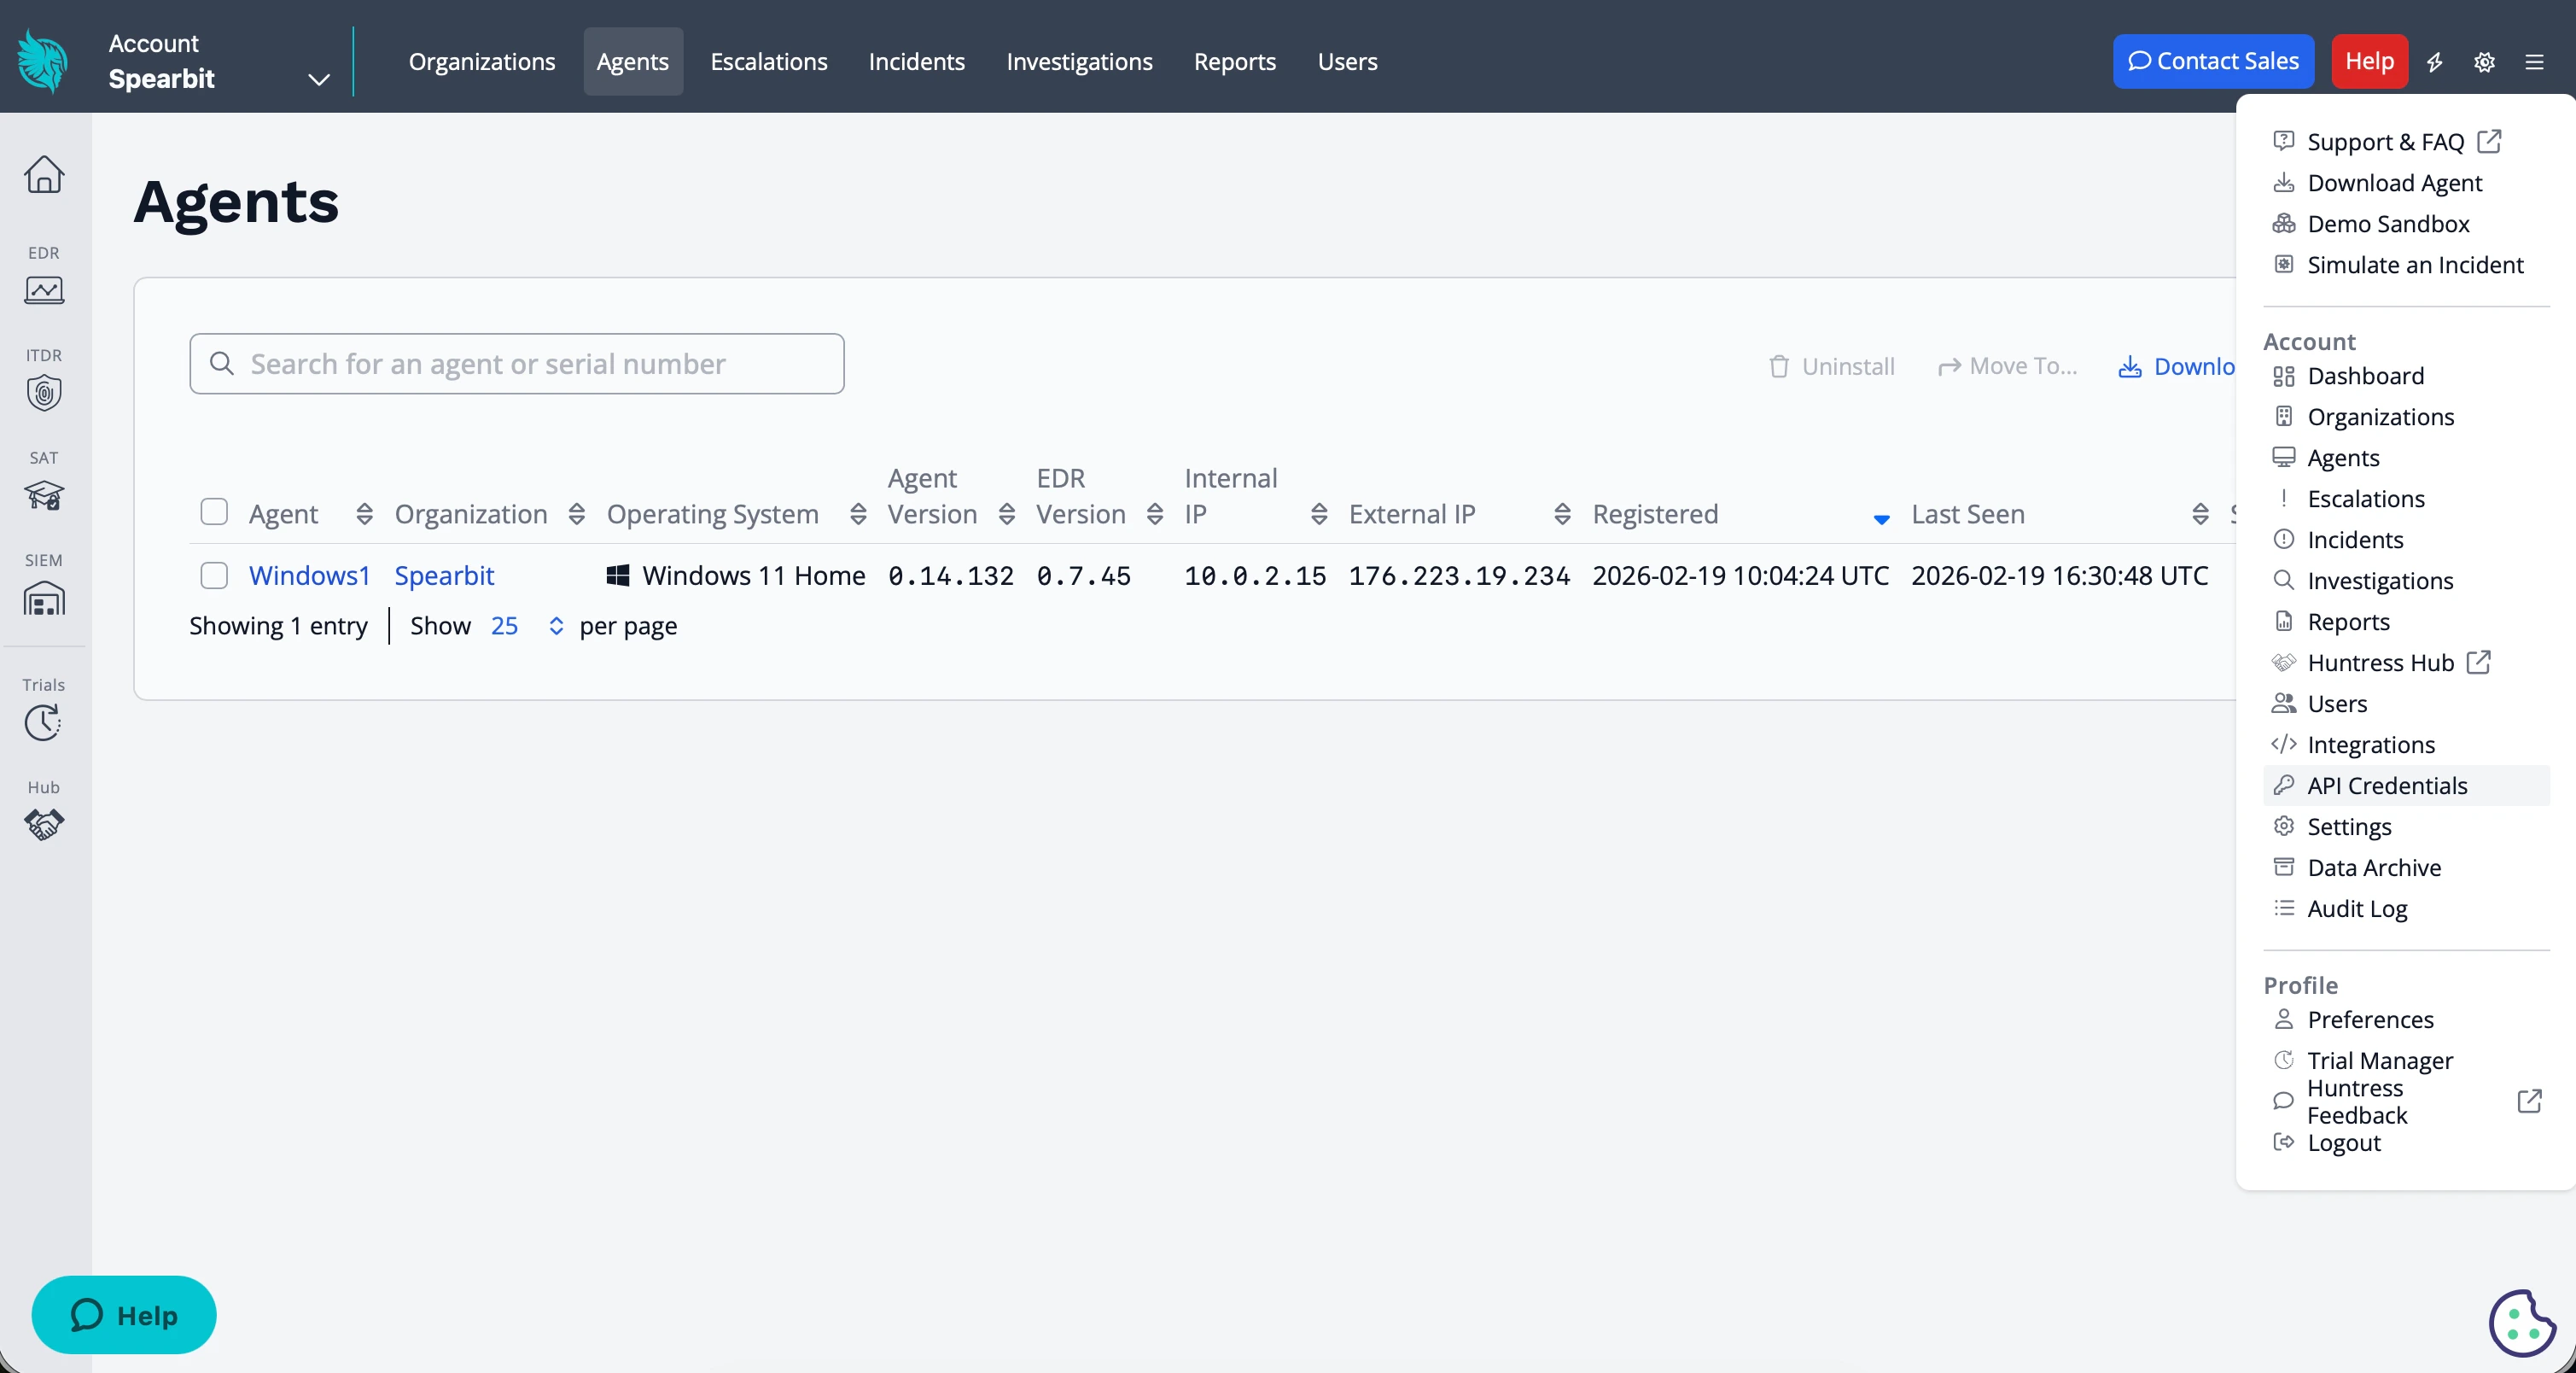
- Select API Credentials.
- In the User API Credentials section, click Add.
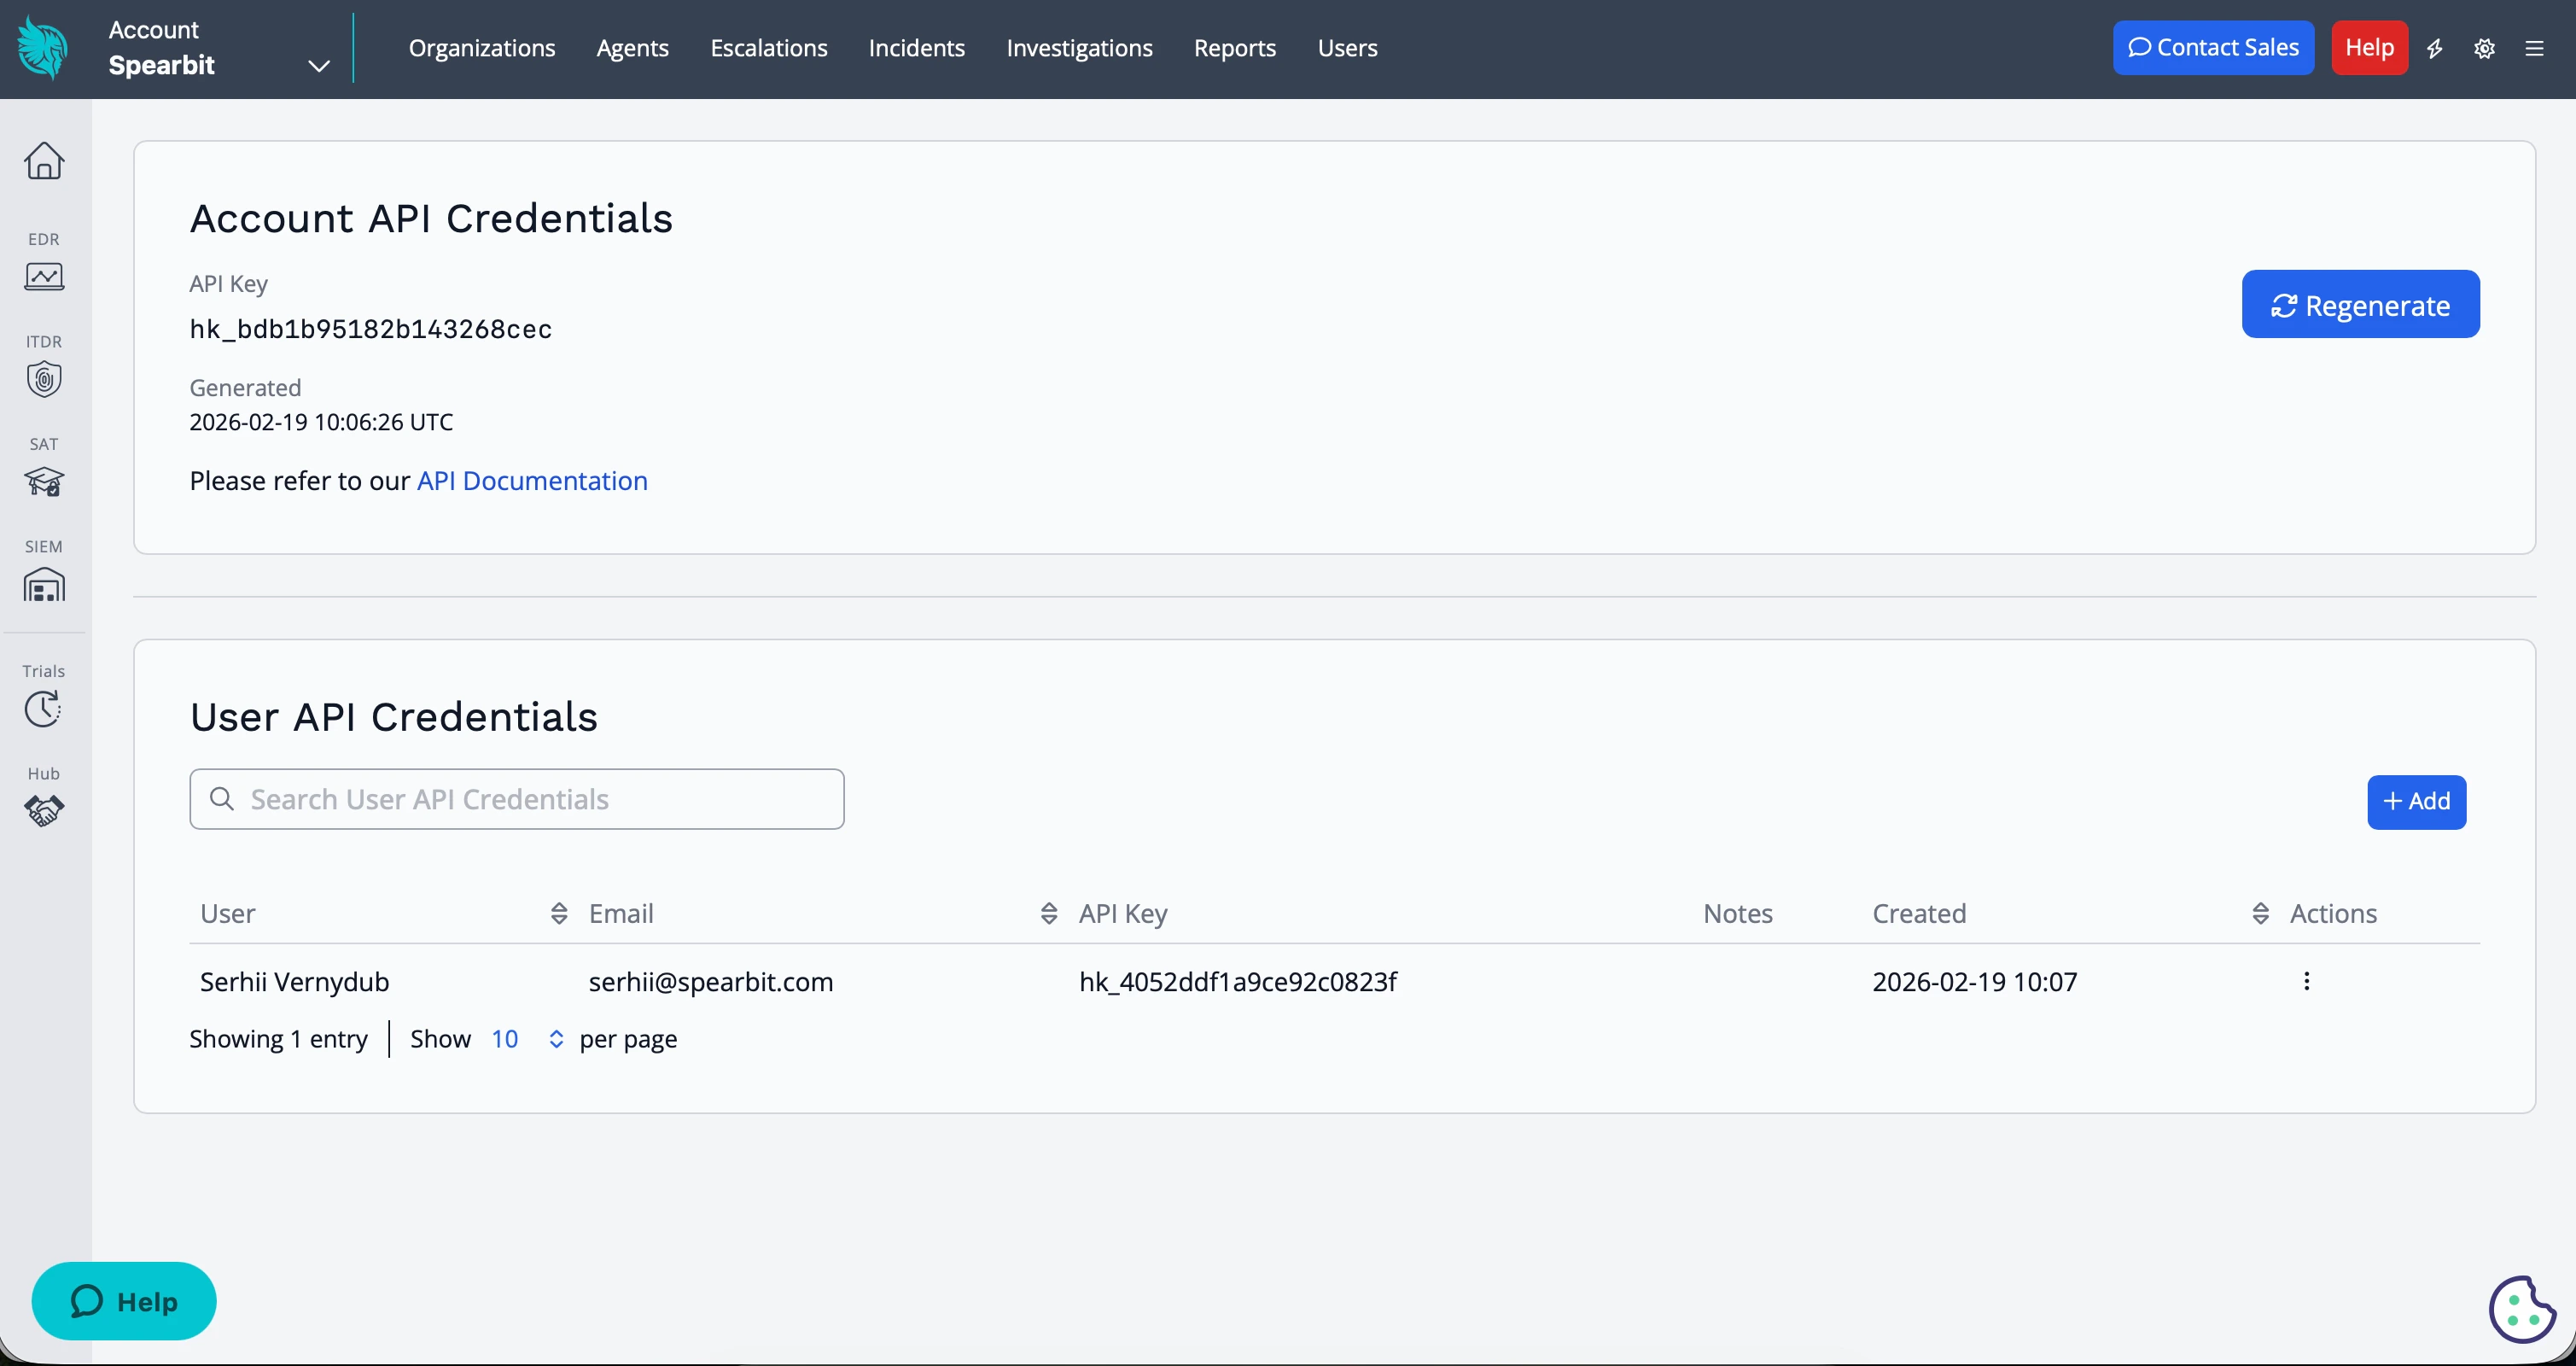
- Select the appropriate user and copy the generated API Key and API Secret
Step 2 — Enter Credentials in Clarion
- In Clarion, open the Huntress integration from your workspace settings
- Paste the API Key and API Secret from Huntress
- Click Connect to activate the integration
Step 3 — Choose the organization
Huntress only issues API credentials at the account level. If you are an MSP, that means a single key can read every client organization in your account — so Clarion asks which one this workspace represents.- In the connected Huntress integration, find the Organization section.
- Open the picker and search by the client’s name as it appears in Huntress. The list is not ordered to match your Clarion workspace names, so searching is usually faster than scrolling.
- Select the organization and click Save.
If you are a direct Huntress customer rather than an MSP, leave this set to Entire account (all organizations) — the default.
Step 4 — Set up webhook alerts (optional)
Webhooks let Huntress push Incident Reports and Escalations to Clarion in real time, where they become issues and flow through automated triage.Configuring webhooks in Huntress requires the account admin role.
- In Clarion, open the connected Huntress integration and find the Webhook alerts section. Copy the Webhook URL.
- In the Huntress dashboard, go to Integrations → Add an Integration → Webhooks and click Add Endpoint.
- Paste the Clarion Webhook URL as the destination URL.
- Enable only the Incident Reports and Escalations categories.
- Open the endpoint’s ⋯ menu and choose View Signing Secret. Copy it.
- Back in Clarion, paste the signing secret into the Signing secret field and click Save.
- In Huntress, use the endpoint’s Send Test option to confirm Clarion receives deliveries.
What happens next
Once configured, Clarion will (within the organization you selected):- Query Huntress for endpoint data during triage (e.g. matching IP addresses to known managed endpoints)
- Use EDR context to validate or dismiss suspicious sign-in alerts from other integrations (e.g. Okta)
- Provide agents with visibility into which devices are protected and their current status
- Turn incoming Incident Report and Escalation webhooks into issues and run automated triage on them (if webhooks are configured)