> ## Documentation Index
> Fetch the complete documentation index at: https://docs.clarion.cantina.xyz/llms.txt
> Use this file to discover all available pages before exploring further.
# Tenderly
> Connect Tenderly to Clarion to receive smart contract monitoring alerts for AI-powered triage and response.
This guide walks you through connecting your Tenderly account to Clarion. By the end, Clarion will receive Tenderly alerts via webhooks and have API access to your Tenderly project for monitoring smart contracts and transactions.
***
## Prerequisites
* A Tenderly account with access to the project you want to monitor.
* Access to the Clarion dashboard.
***
## Step 1 — Generate a Tenderly Access Token
1. Open Tenderly and go to **Settings**.
2. Under settings, find the **Integrations** section and click **Generate Access Token**.
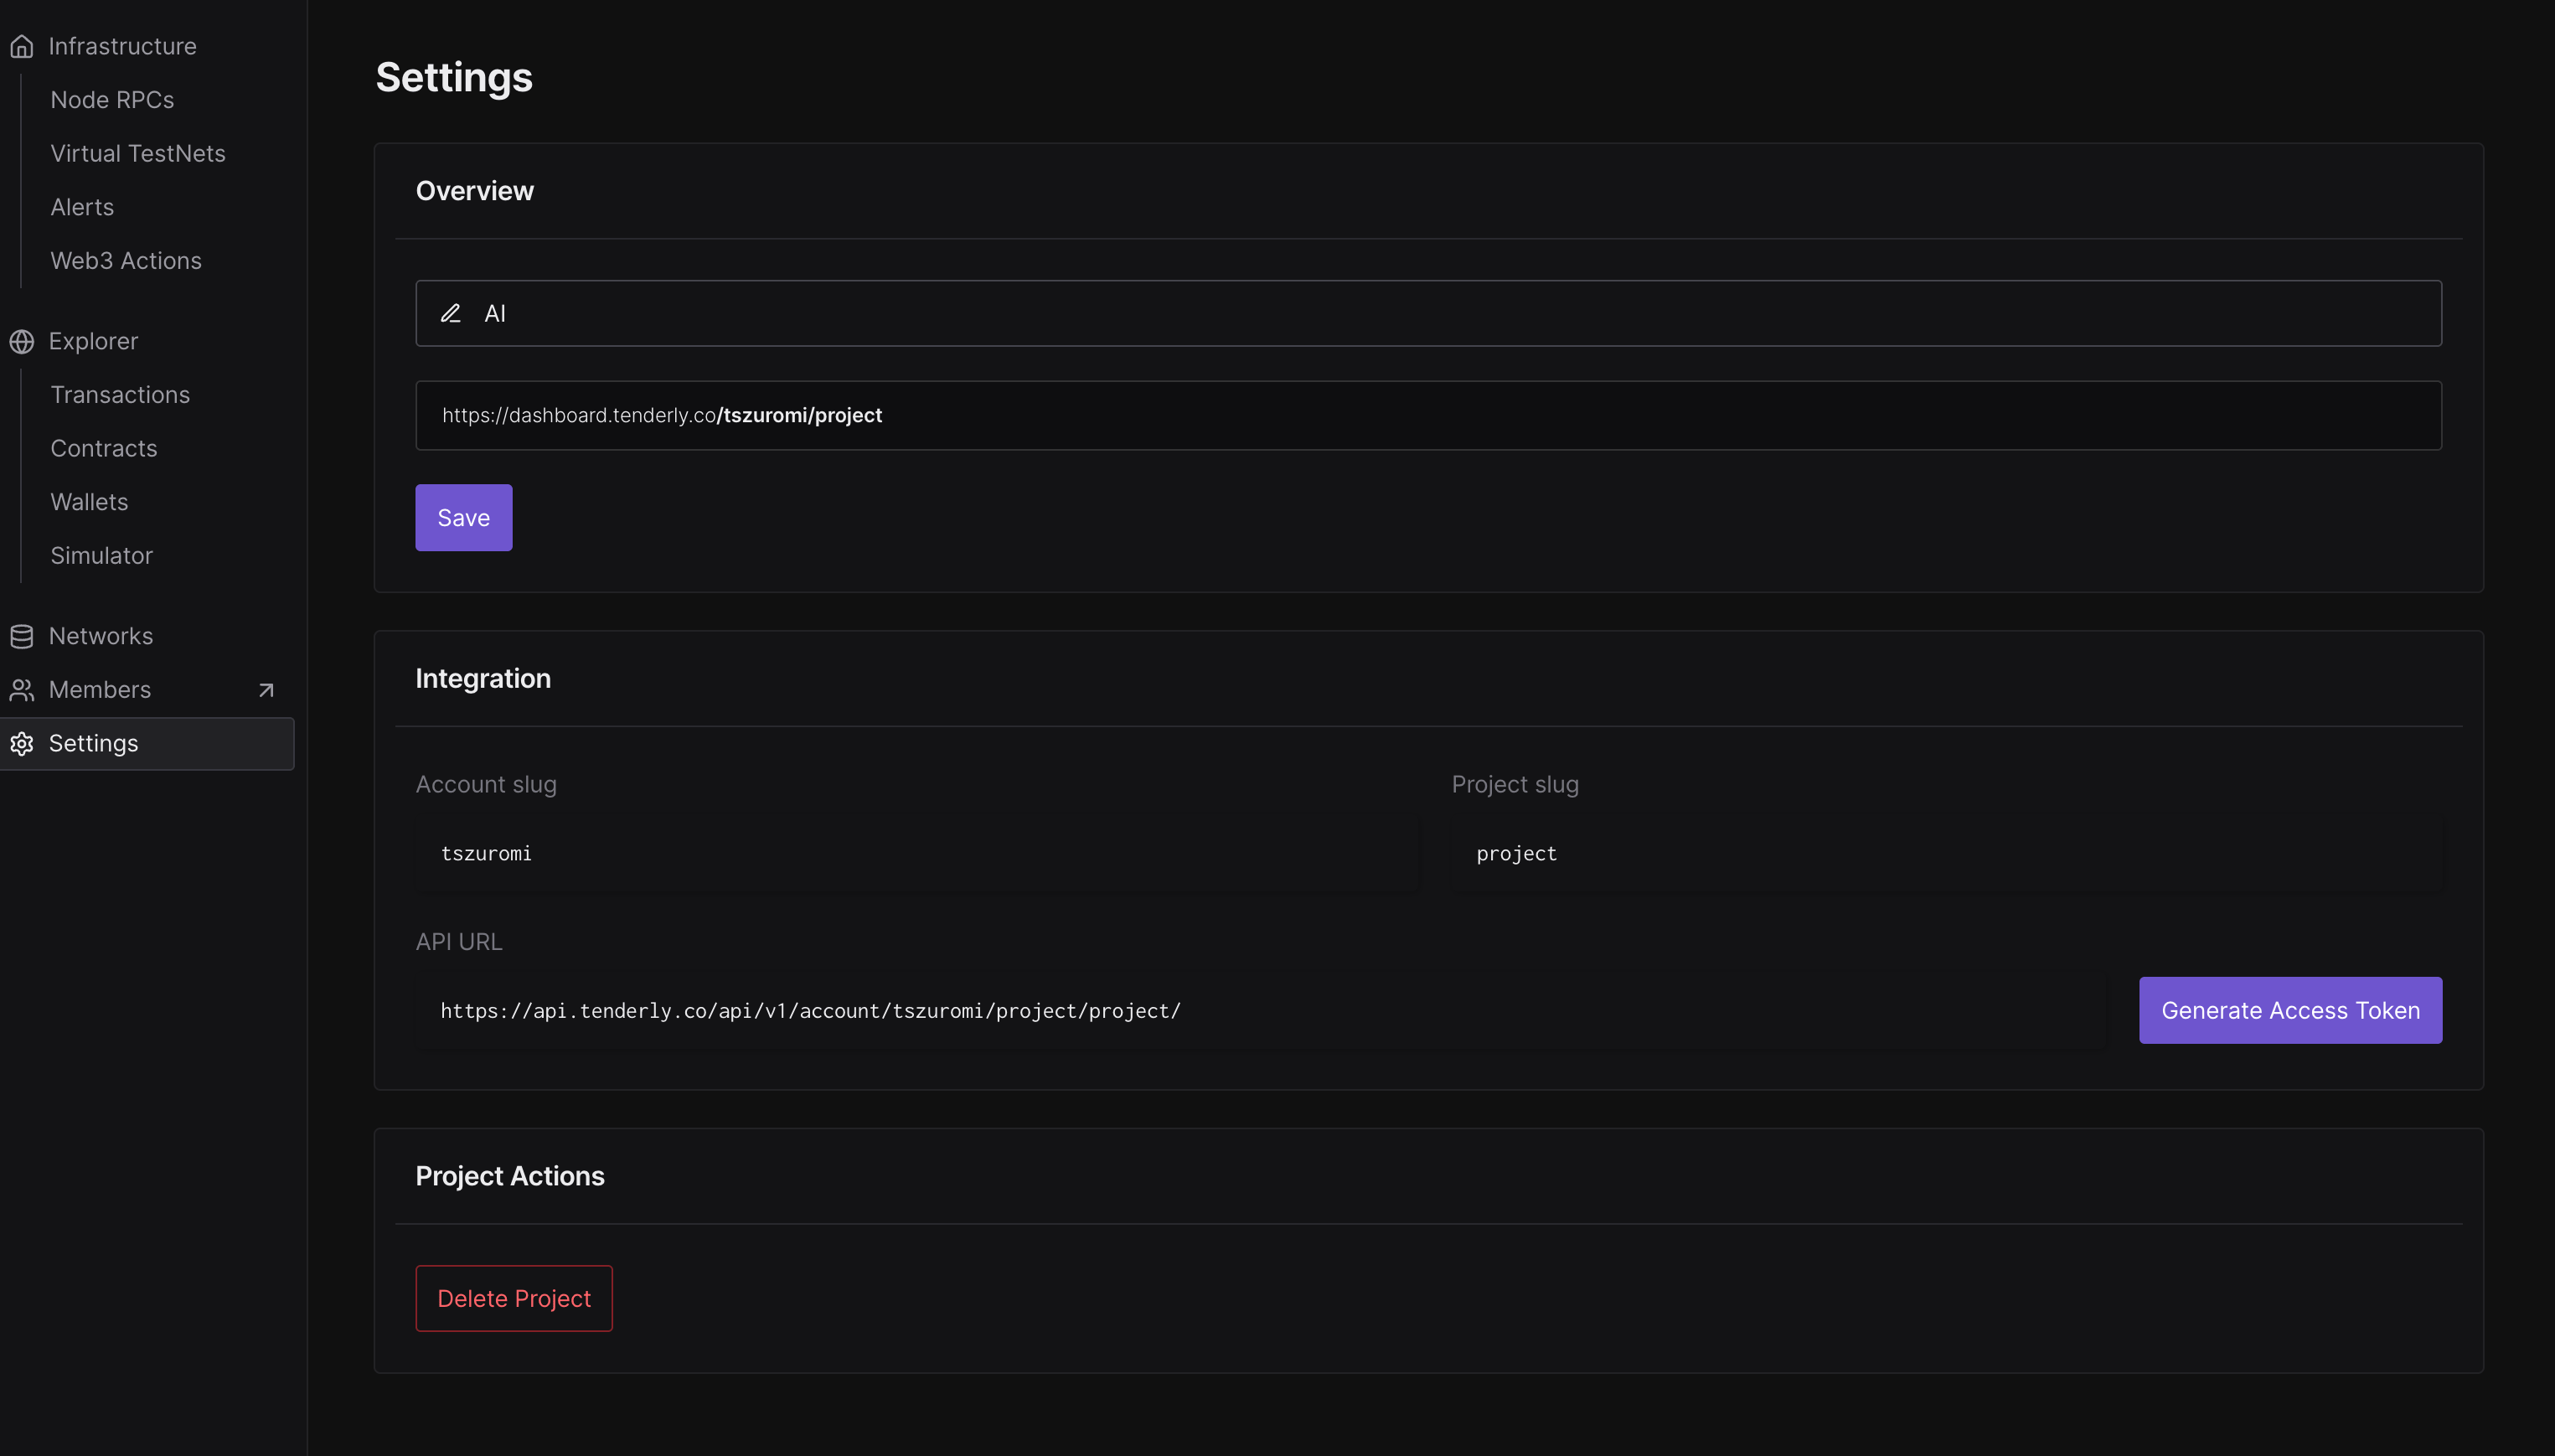 3. Give the token a descriptive name (e.g. `Clarion`).
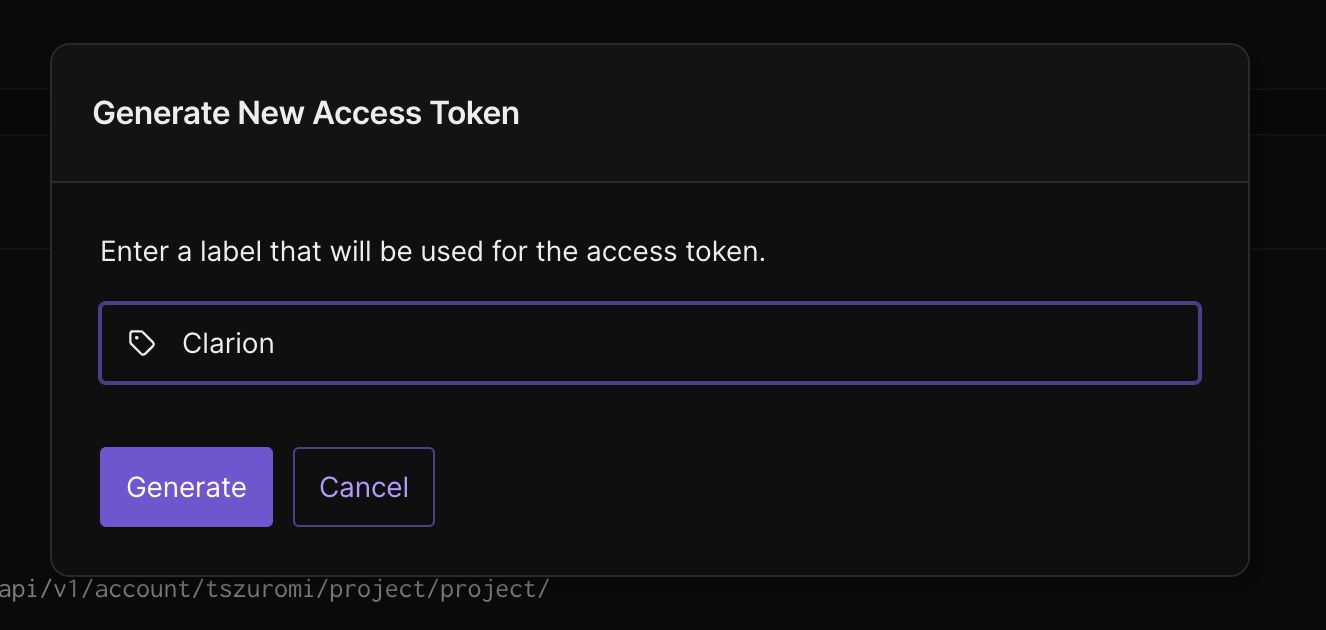 4. Copy the access token immediately — it is only displayed once.
Store this token somewhere safe temporarily. You'll need it in the next step and won't be able to view it again.
***
## Step 2 — Connect Tenderly to Clarion
1. In Clarion, navigate to **Integrations** and find the **Tenderly** integration.
2. Paste the access token you copied in Step 1 and click **Connect**.
4. Copy the access token immediately — it is only displayed once.
Store this token somewhere safe temporarily. You'll need it in the next step and won't be able to view it again.
***
## Step 2 — Connect Tenderly to Clarion
1. In Clarion, navigate to **Integrations** and find the **Tenderly** integration.
2. Paste the access token you copied in Step 1 and click **Connect**.
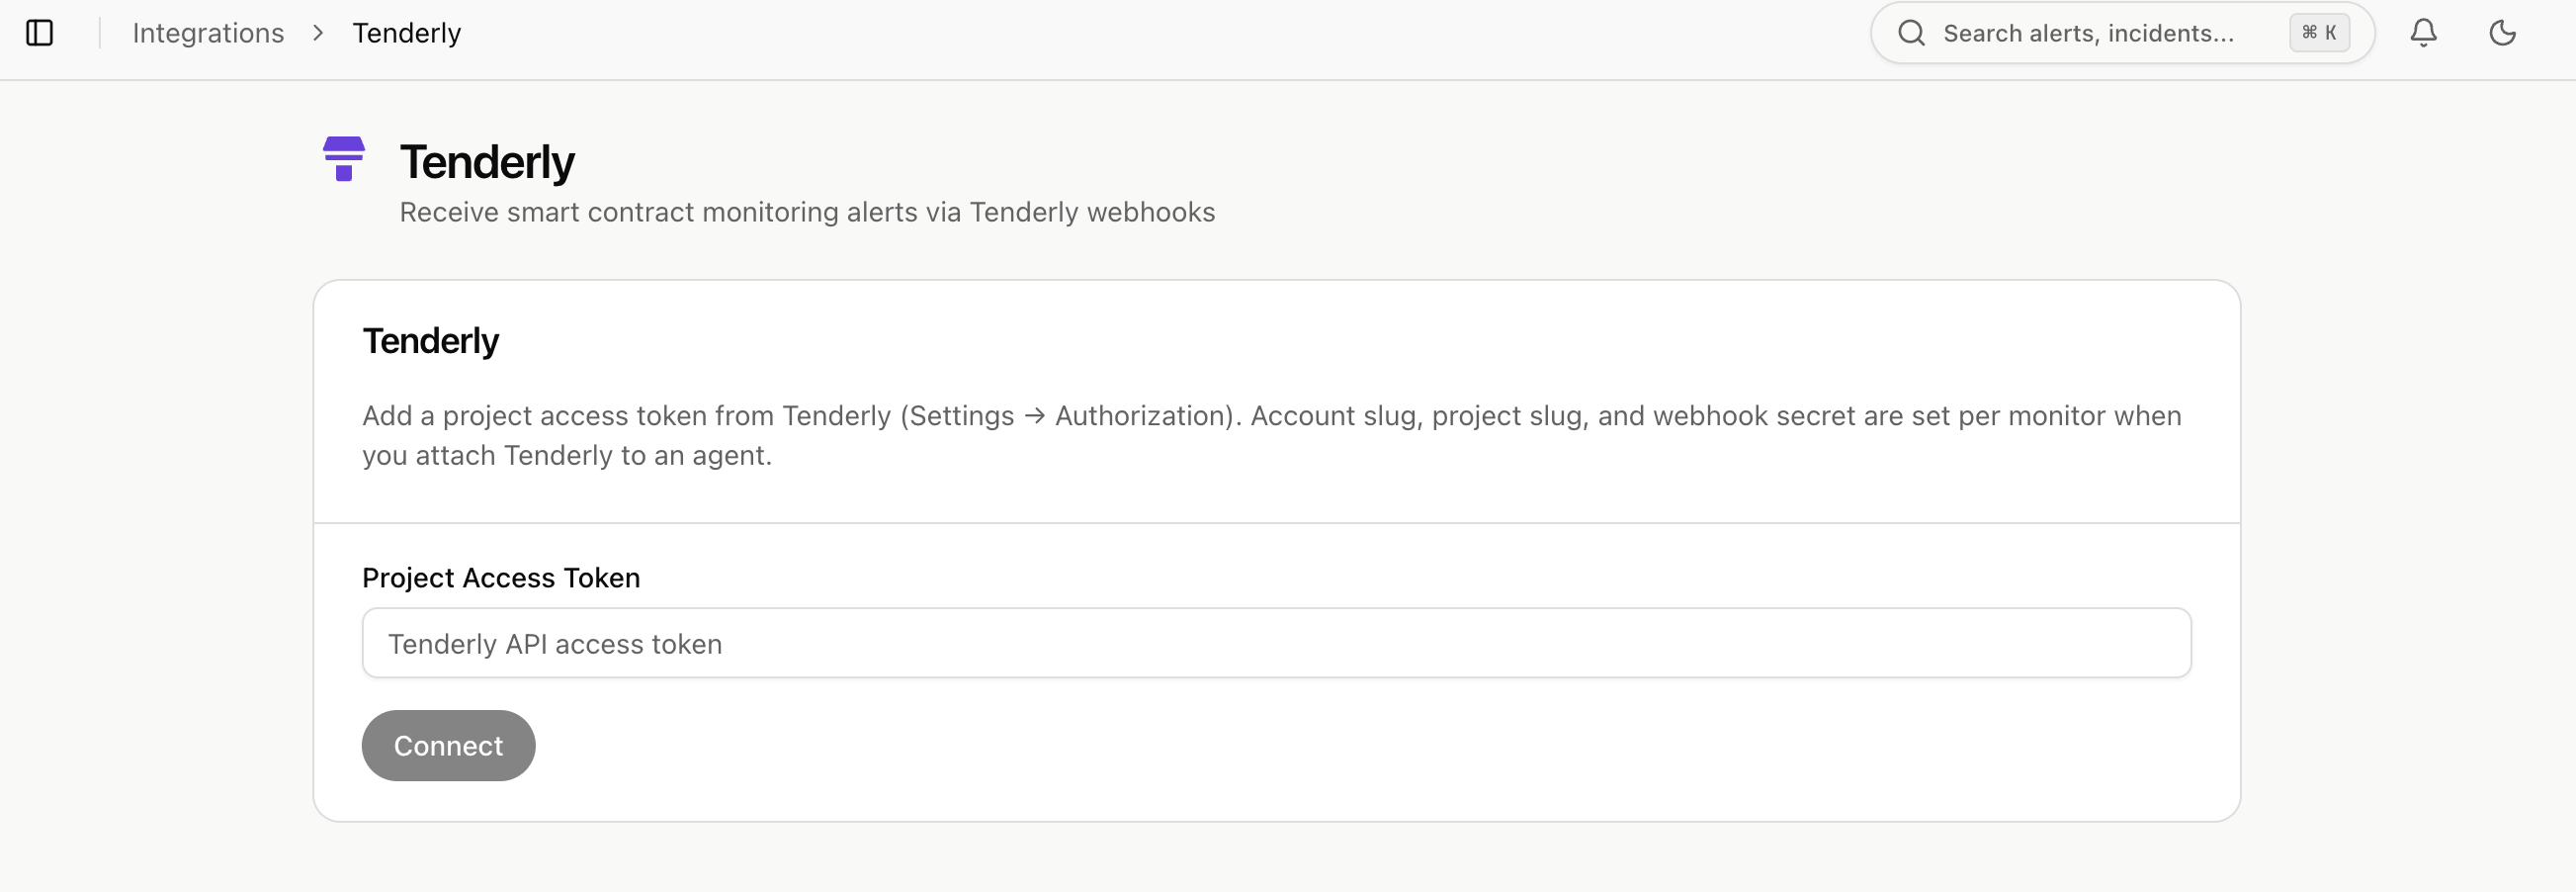 3. Once connected, click **Configure** on the integration page.
***
## Step 3 — Create a Monitor in Clarion
1. Switch to the **Monitor** tab and click **Add New Monitor**.
3. Once connected, click **Configure** on the integration page.
***
## Step 3 — Create a Monitor in Clarion
1. Switch to the **Monitor** tab and click **Add New Monitor**.
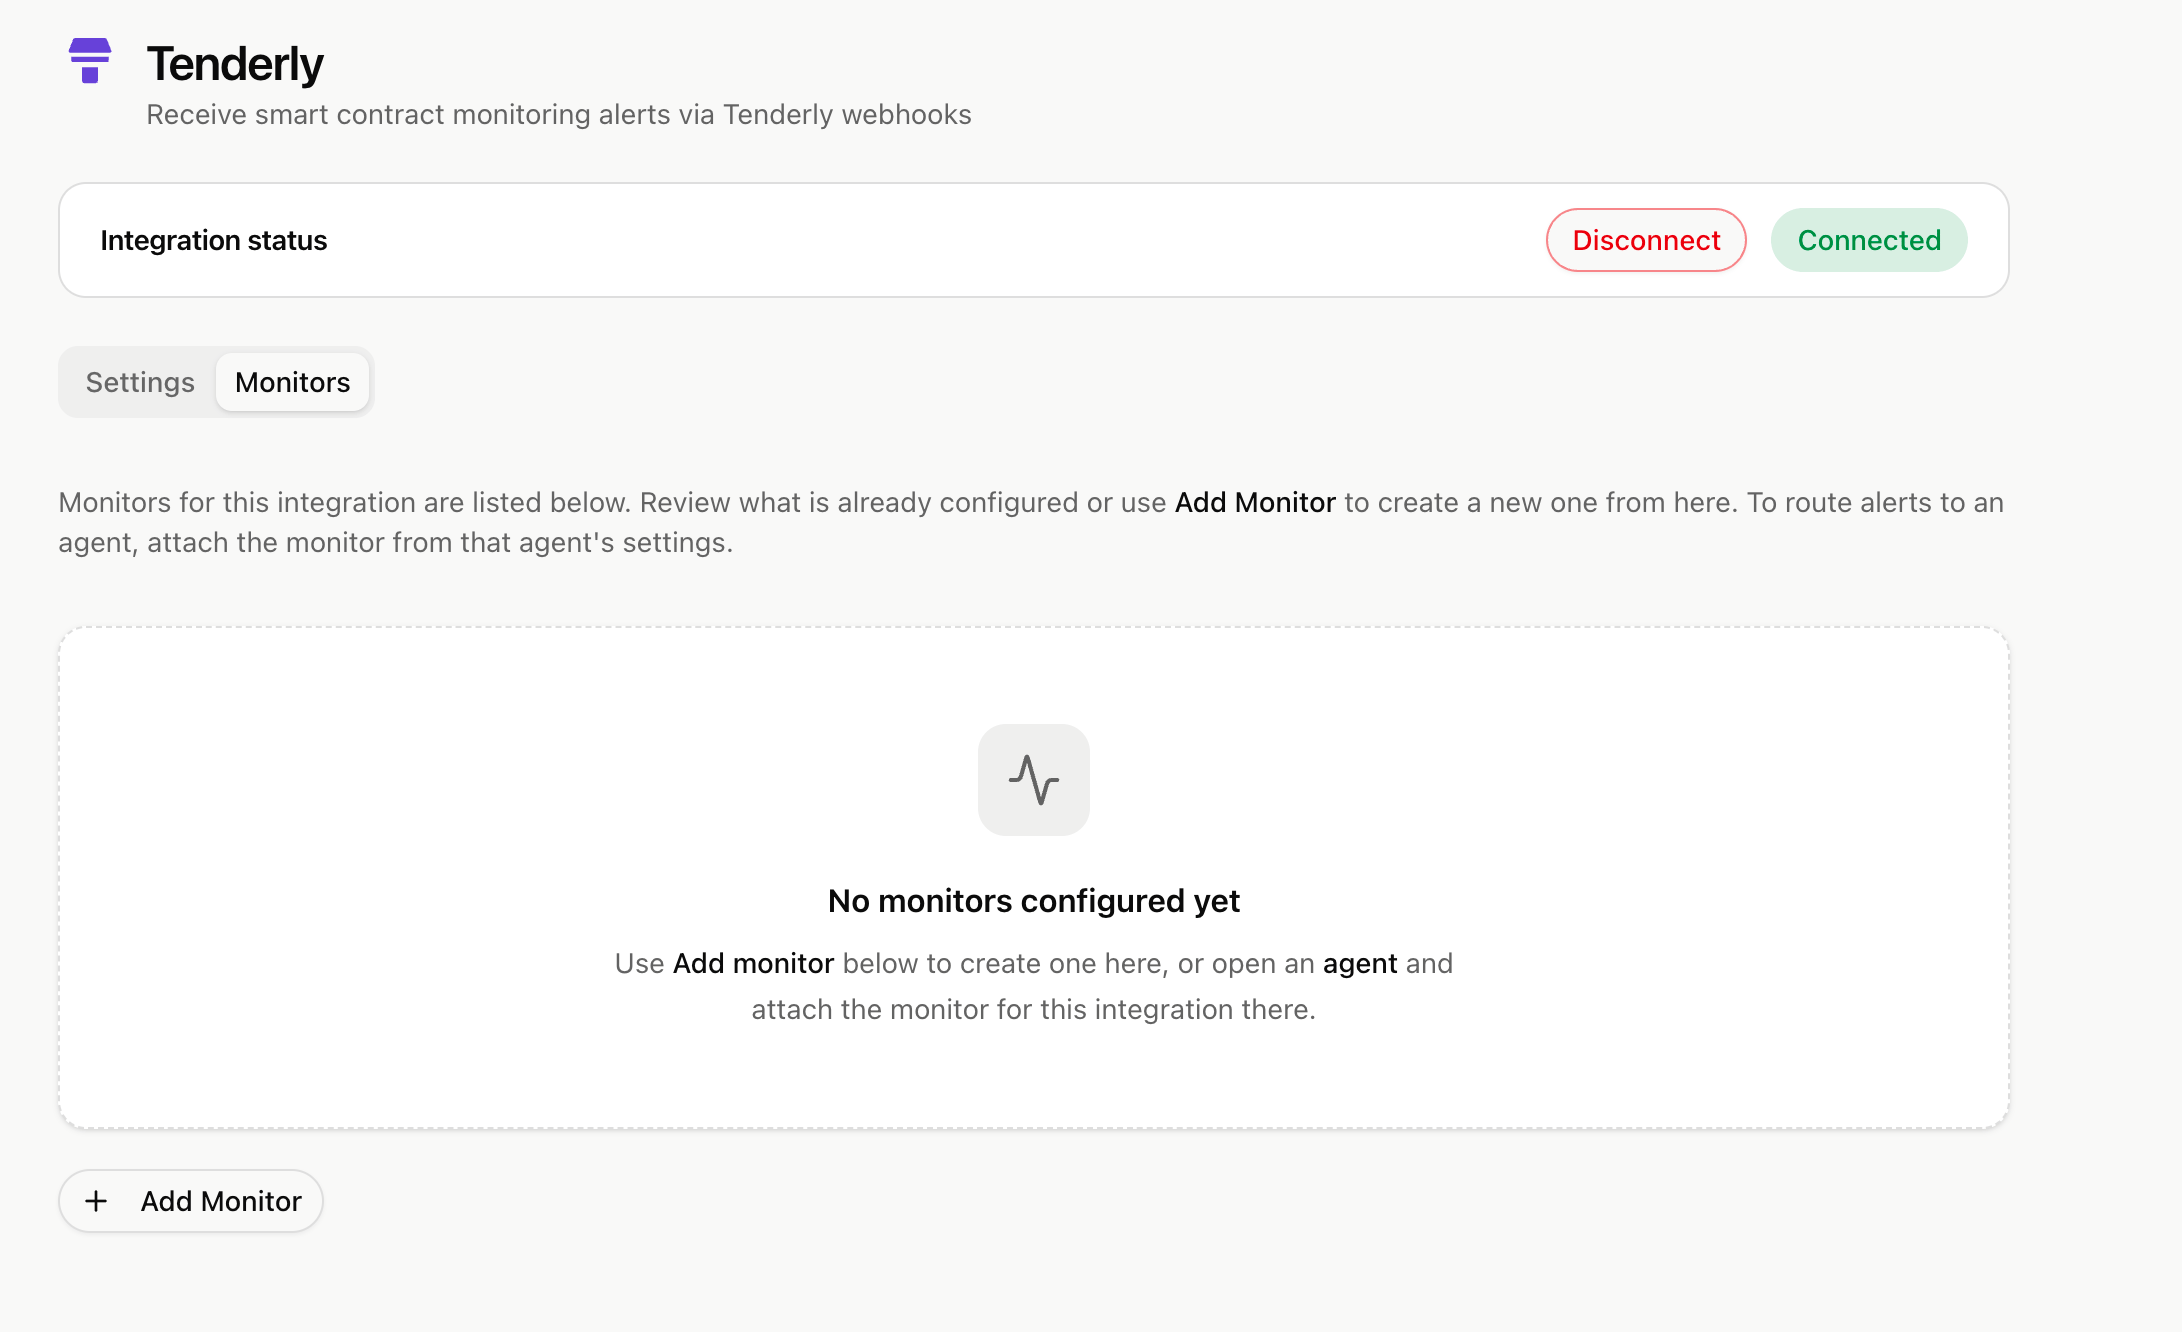 2. Go back to Tenderly **Settings** and copy your **Account Slug** and **Project Slug**.
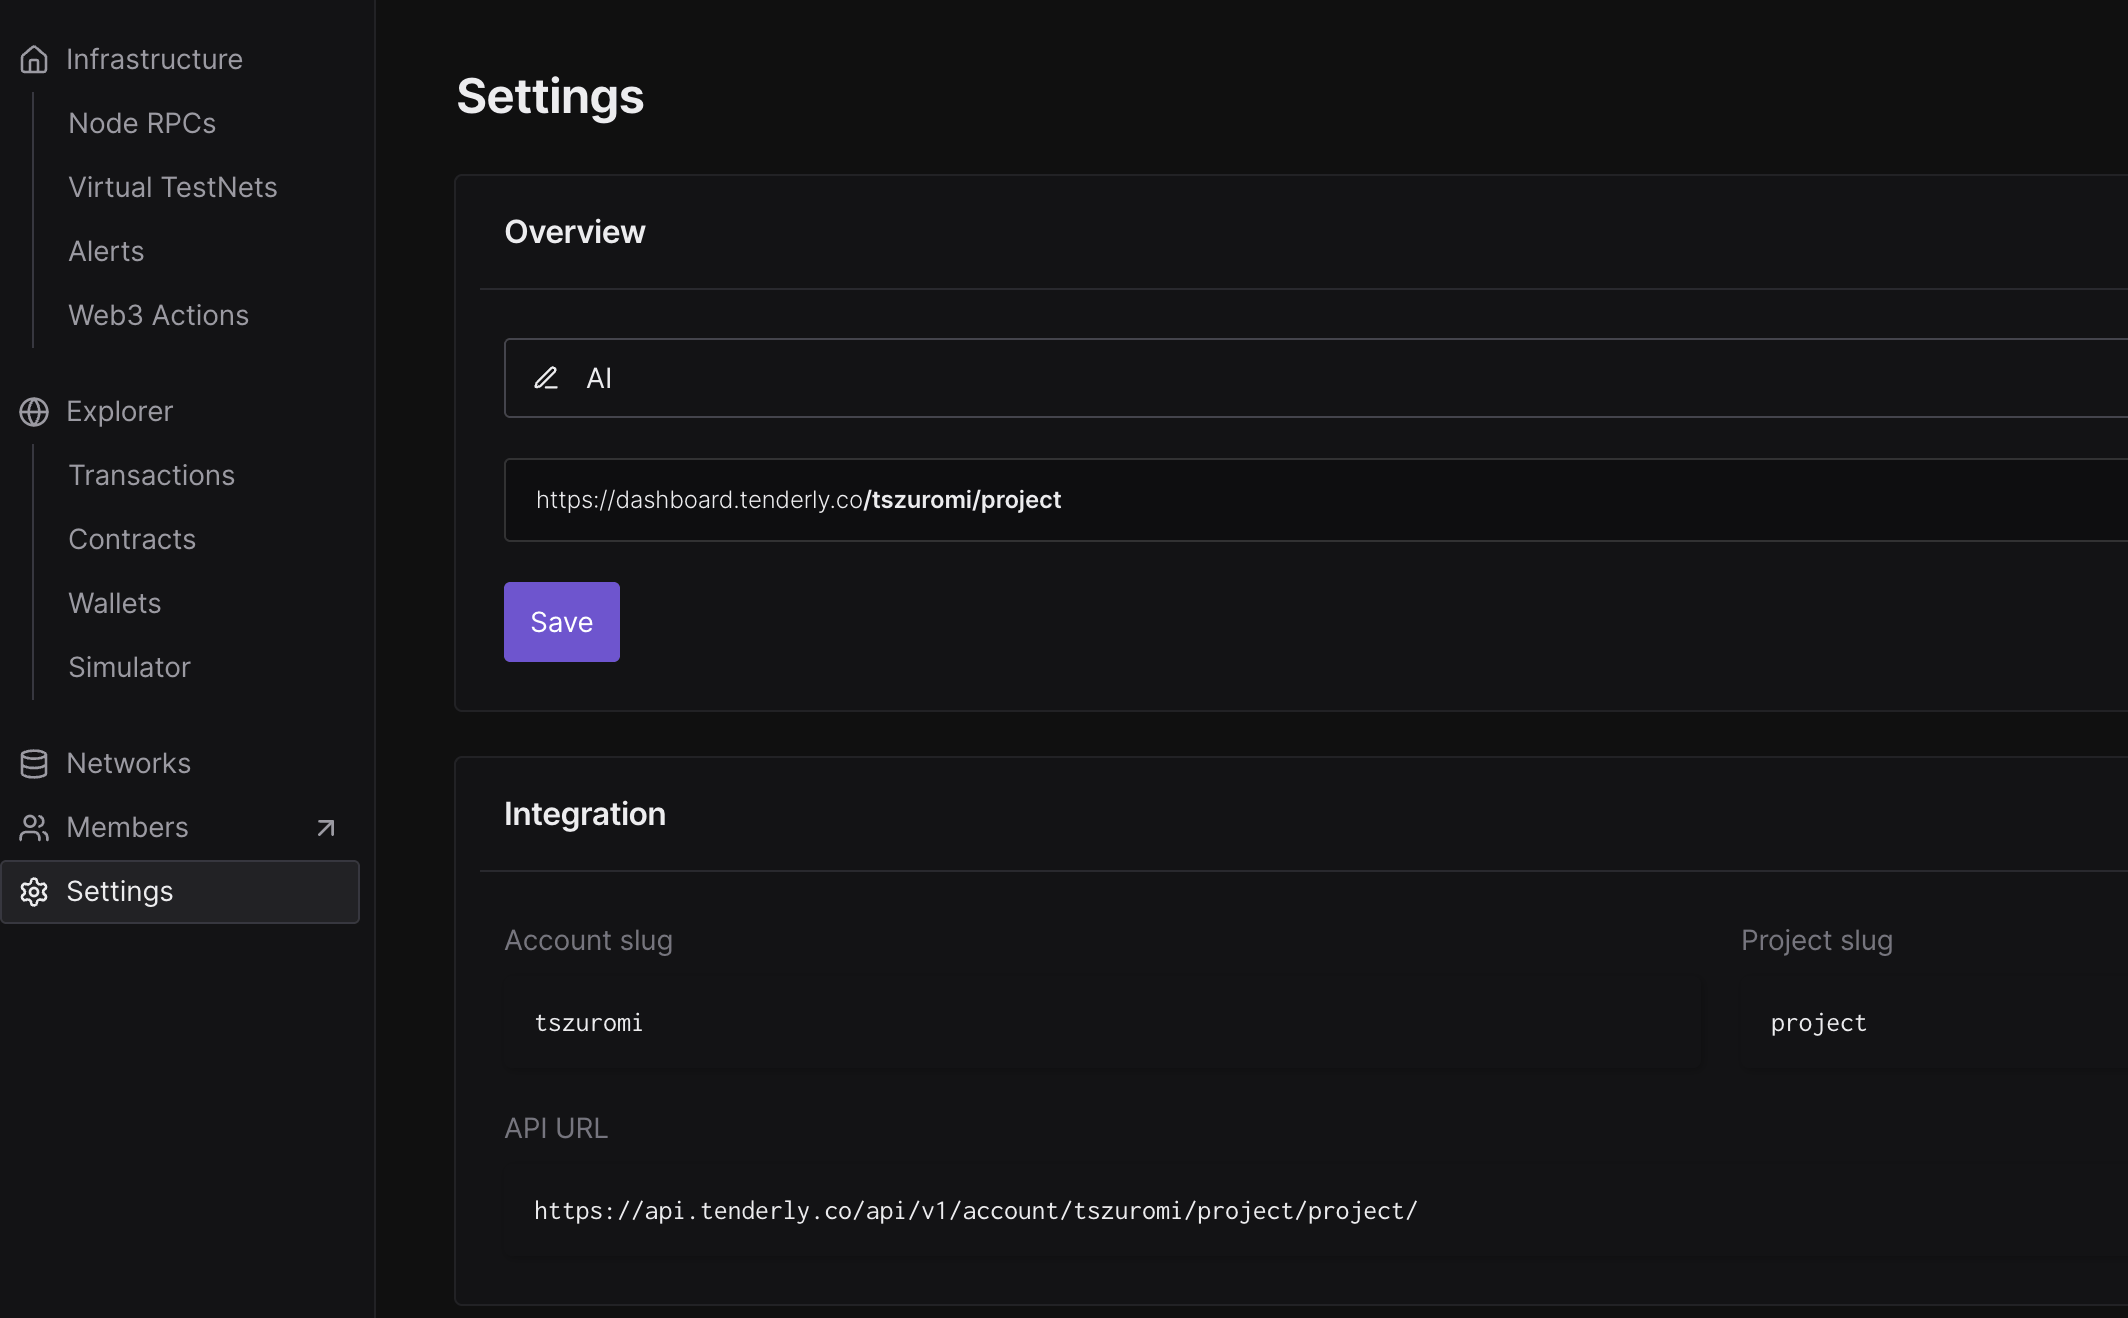 3. Paste both slugs into the corresponding fields in Clarion.
4. Leave the **Webhook Secret** field empty for now — you'll fill it in after setting up the webhook in Tenderly.
5. Click **Create Monitor**. Clarion will generate a webhook URL that you'll need in the next step.
3. Paste both slugs into the corresponding fields in Clarion.
4. Leave the **Webhook Secret** field empty for now — you'll fill it in after setting up the webhook in Tenderly.
5. Click **Create Monitor**. Clarion will generate a webhook URL that you'll need in the next step.
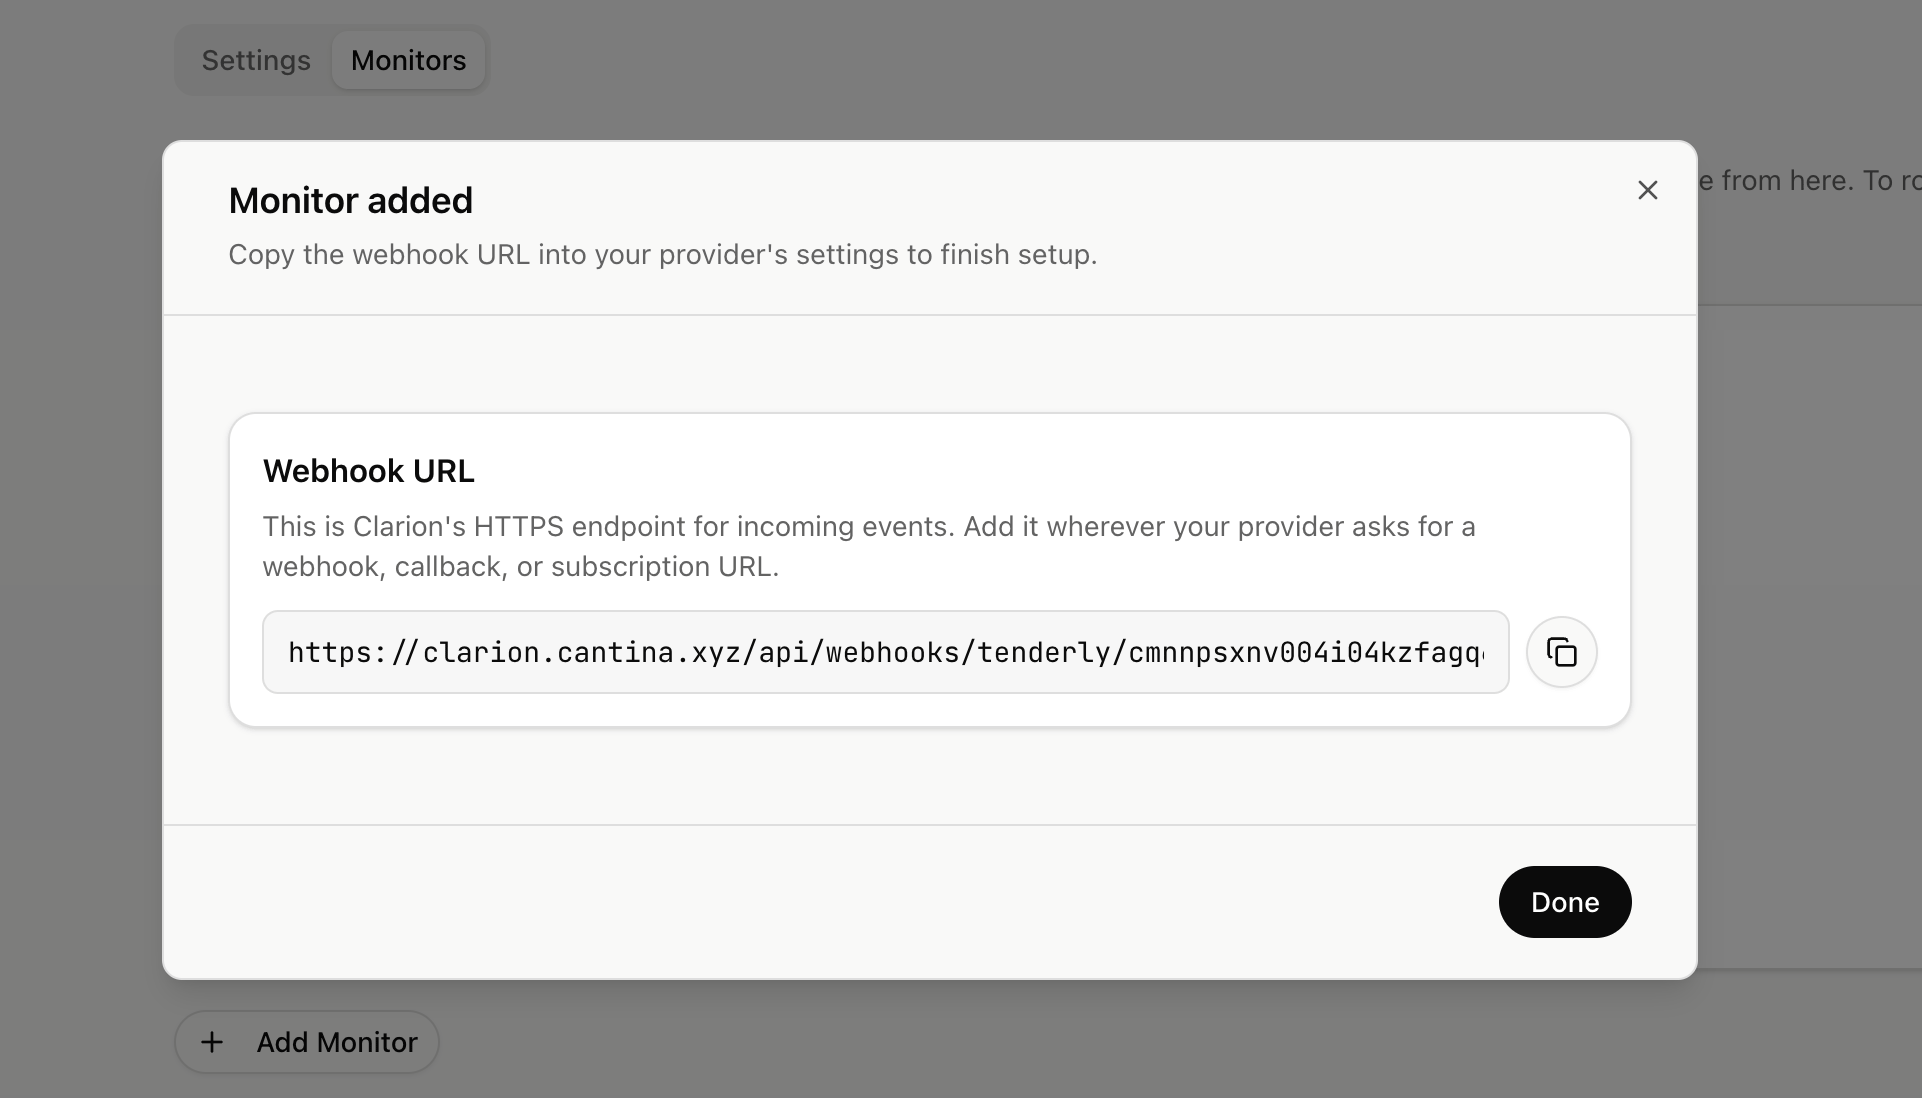 Copy the generated webhook URL — you'll use it to set up the destination in Tenderly.
***
## Step 4 — Set Up the Webhook Destination in Tenderly
1. In Tenderly, go to **Alerts** and switch to the **Destinations** tab.
Copy the generated webhook URL — you'll use it to set up the destination in Tenderly.
***
## Step 4 — Set Up the Webhook Destination in Tenderly
1. In Tenderly, go to **Alerts** and switch to the **Destinations** tab.
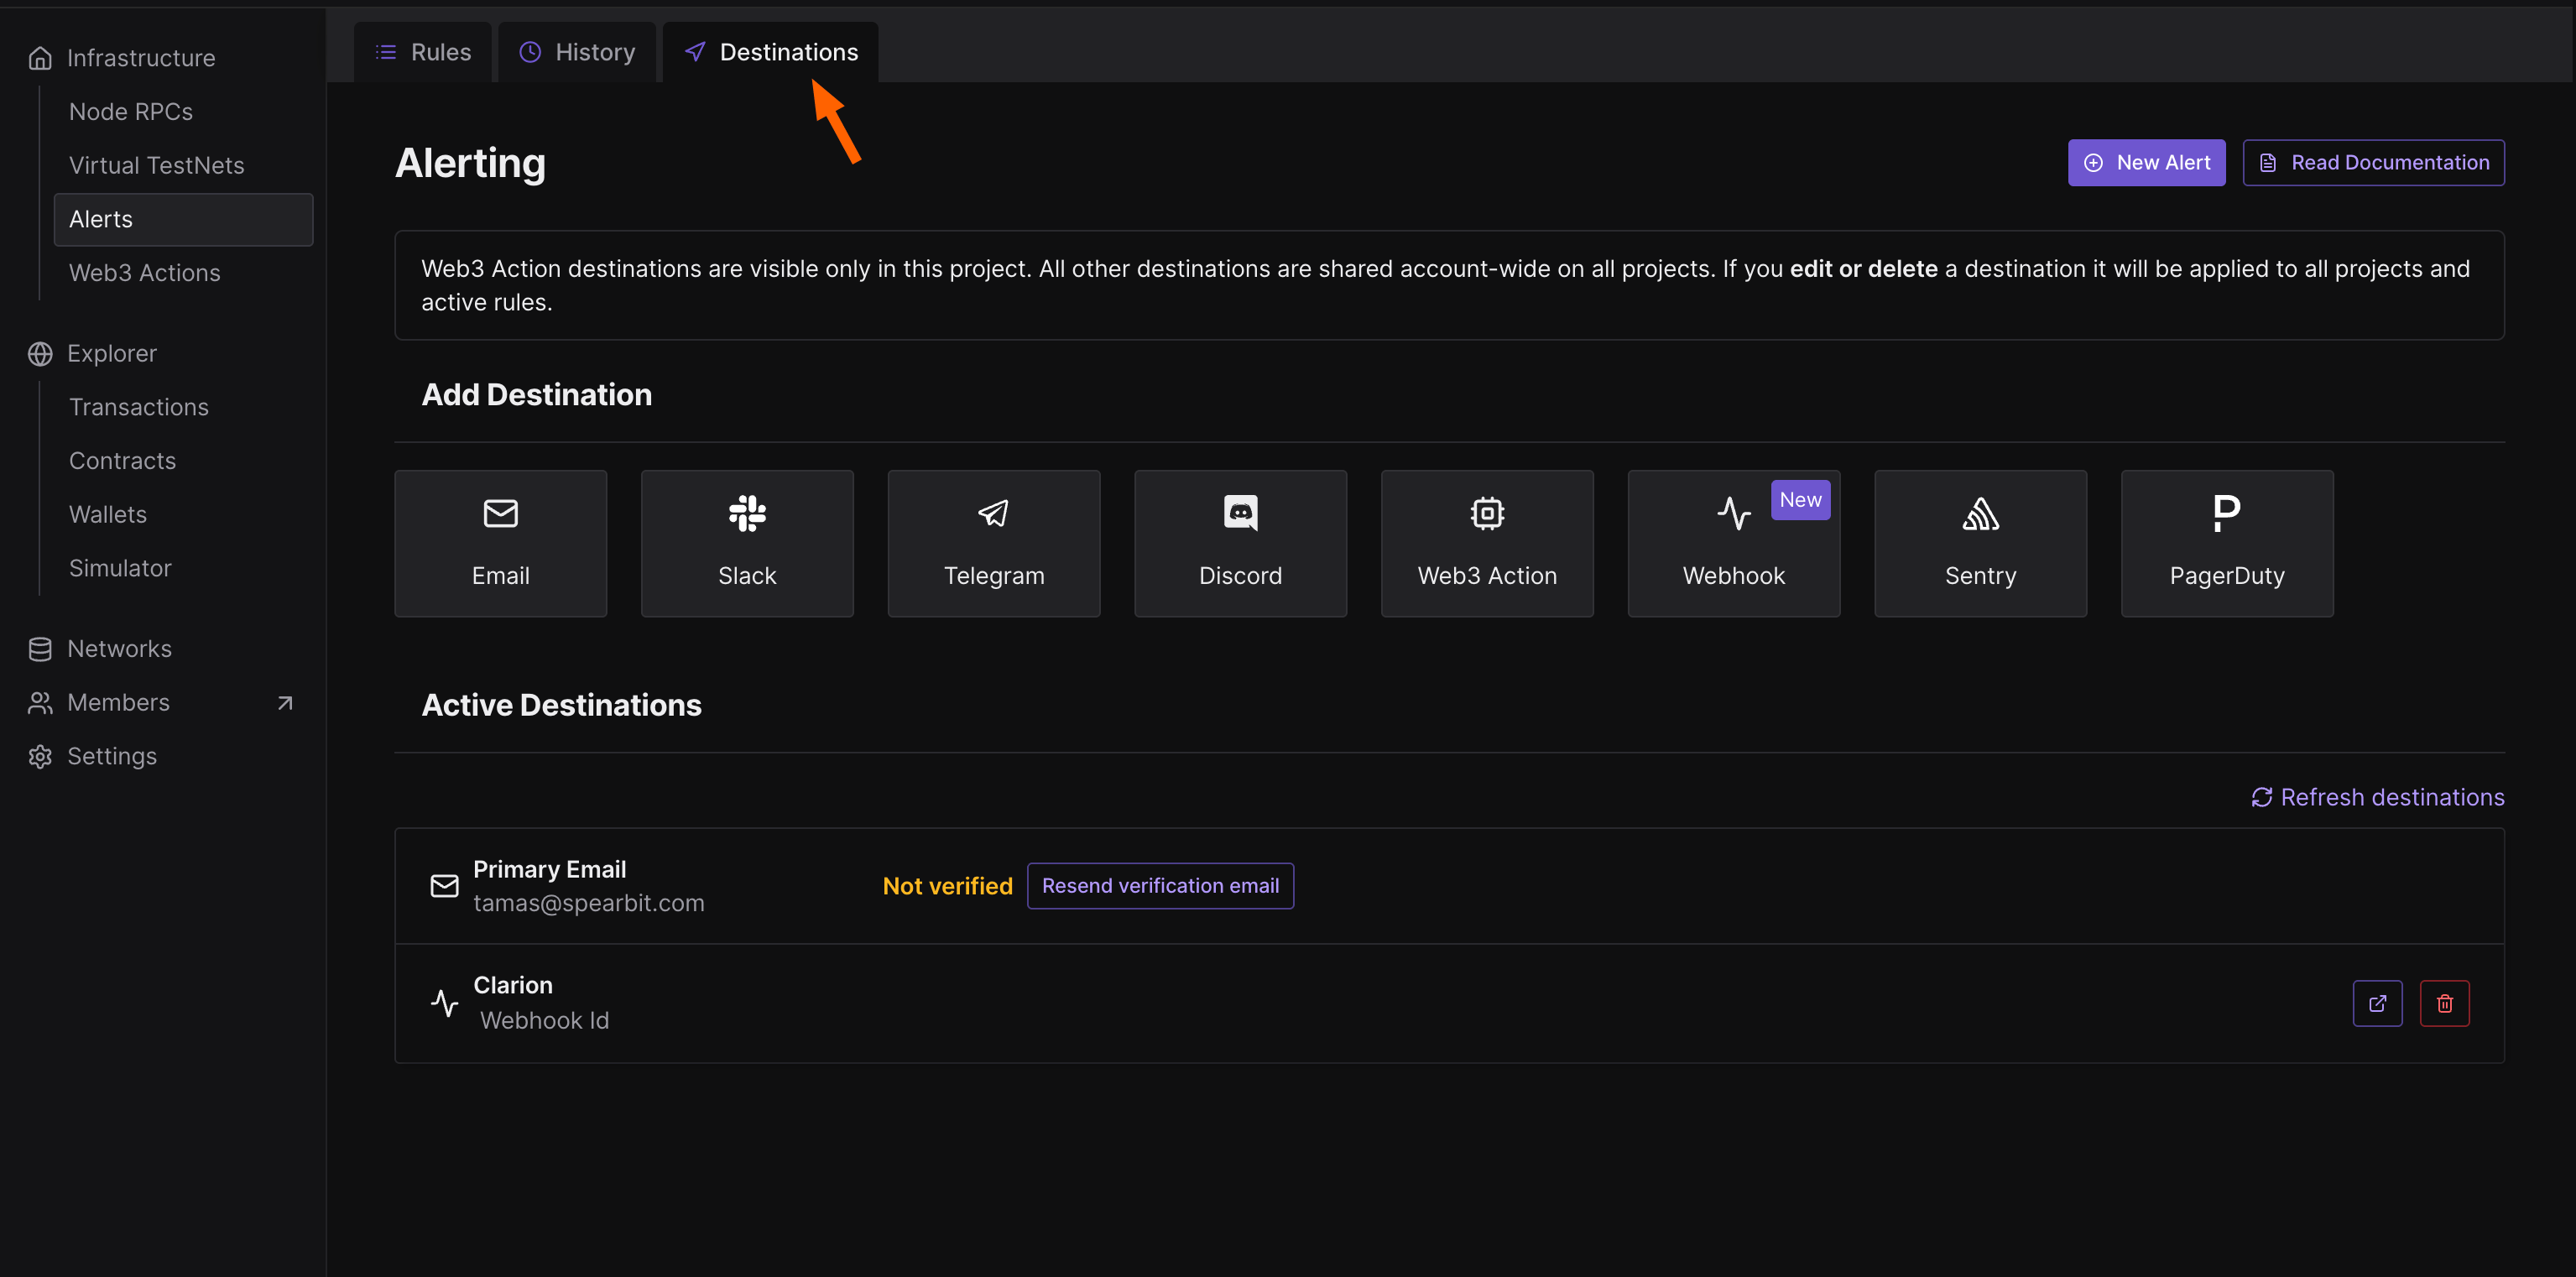 2. Select **Webhook** as the type under **Add Destination**.
3. Paste the webhook URL generated by Clarion in Step 3.
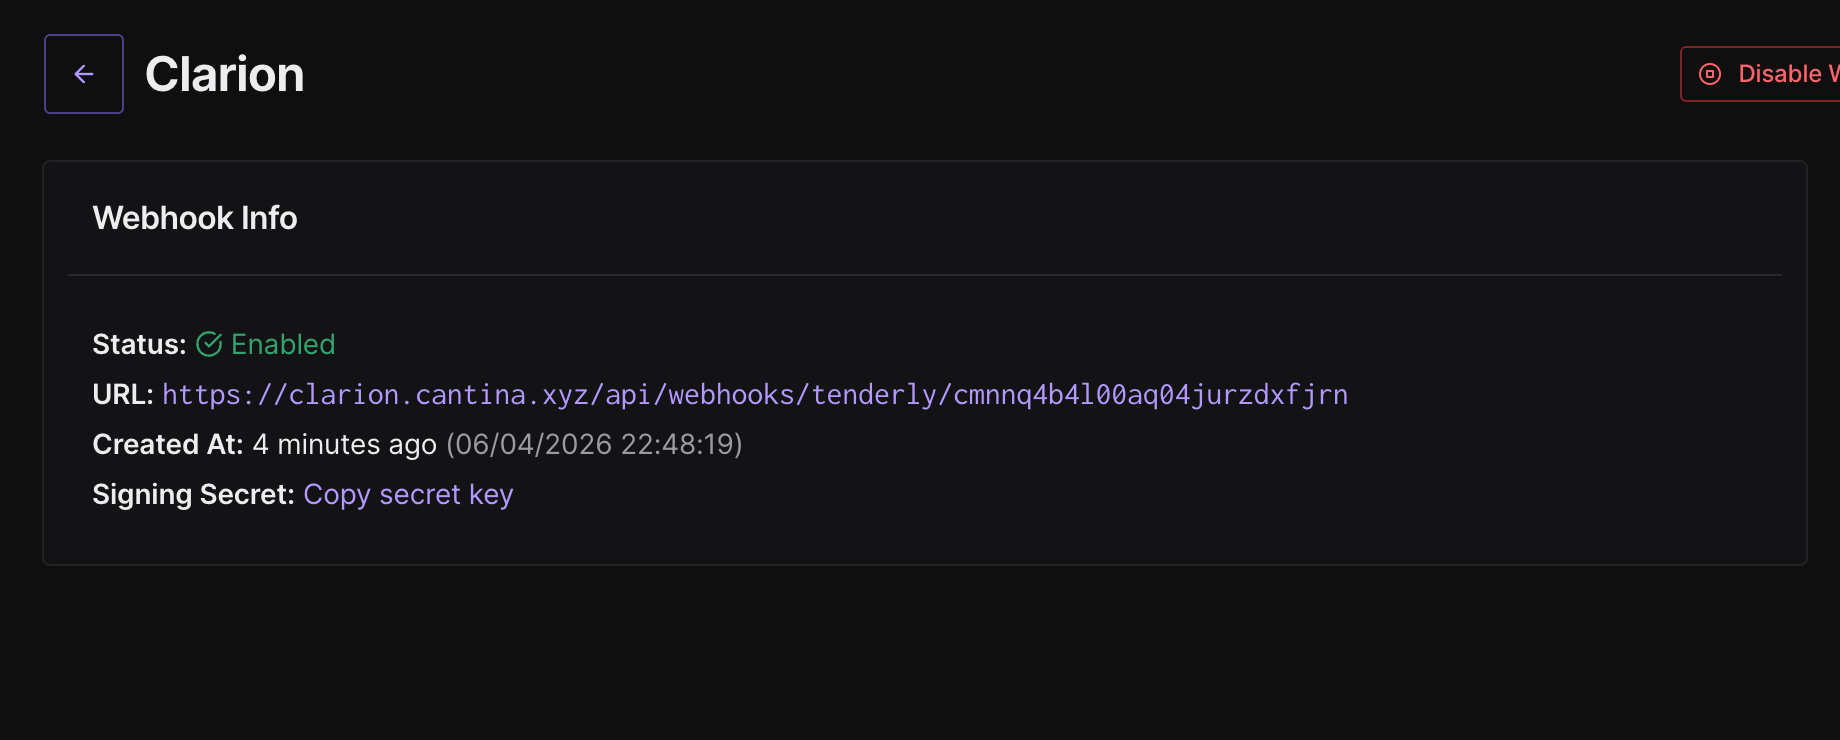
4. Save the destination. Once created, Tenderly will display a **Signing Secret** for this webhook.
5. Copy the **Signing Secret**.
2. Select **Webhook** as the type under **Add Destination**.
3. Paste the webhook URL generated by Clarion in Step 3.
4. Save the destination. Once created, Tenderly will display a **Signing Secret** for this webhook.
5. Copy the **Signing Secret**.
 ***
## Step 5 — Add the Signing Secret to Clarion
1. Go back to Clarion and open the monitor you created in Step 3.
2. Click on the monitor.
***
## Step 5 — Add the Signing Secret to Clarion
1. Go back to Clarion and open the monitor you created in Step 3.
2. Click on the monitor.
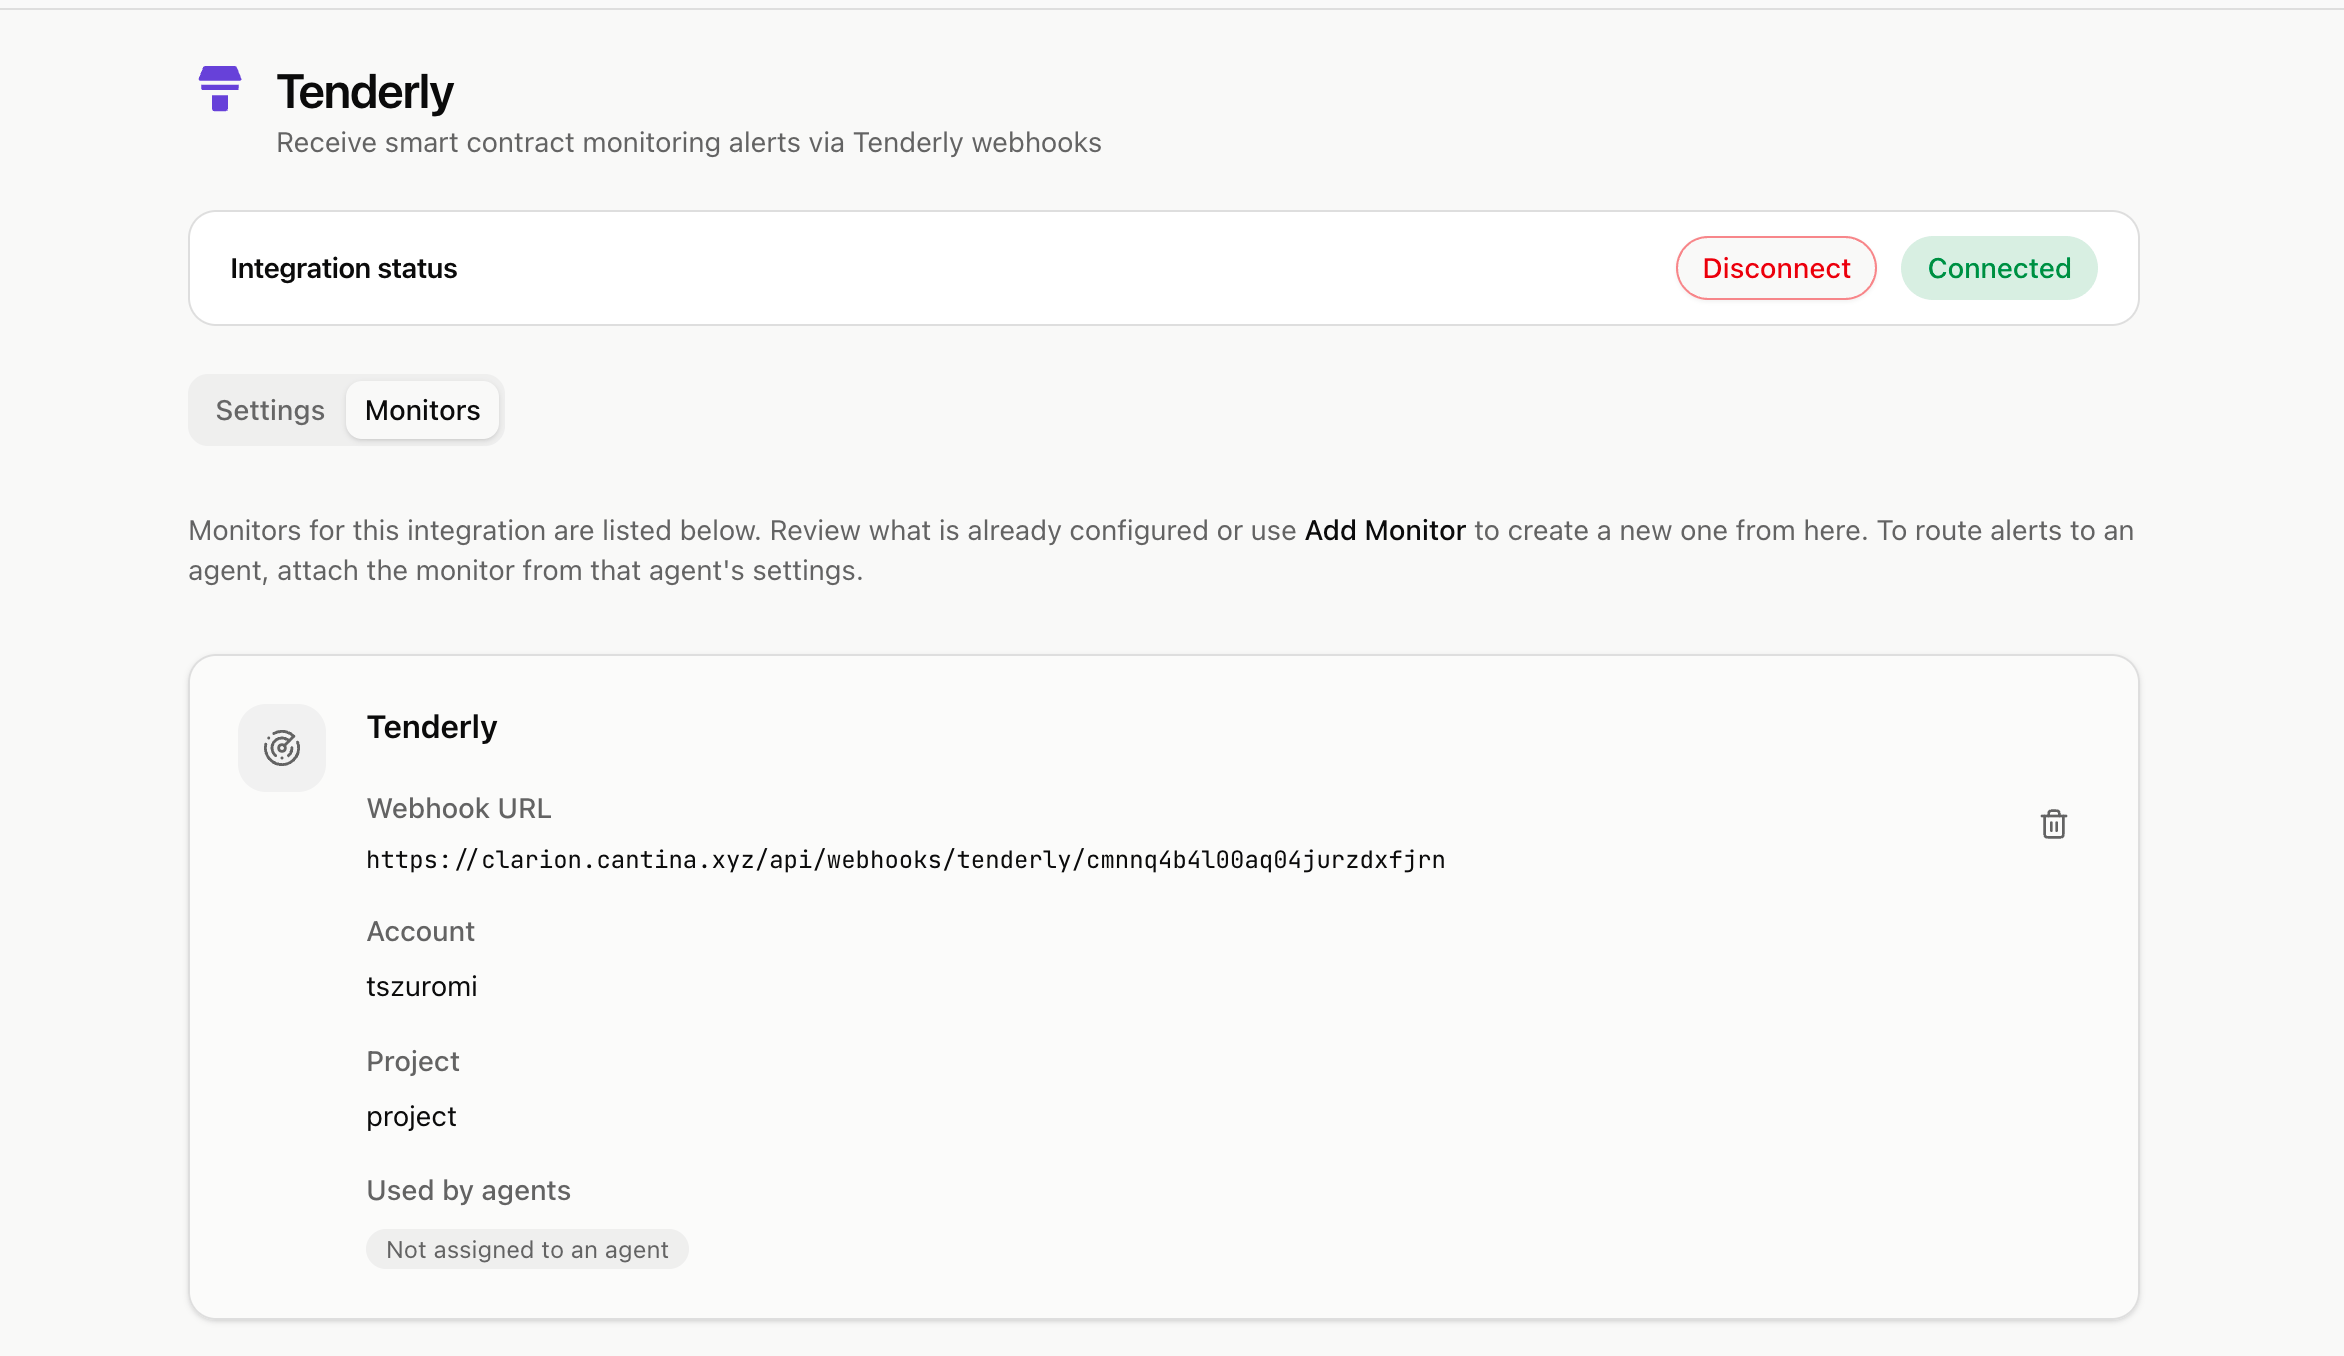 3. Paste the **Signing Secret** from Tenderly into the **Webhook Signing Secret** field.
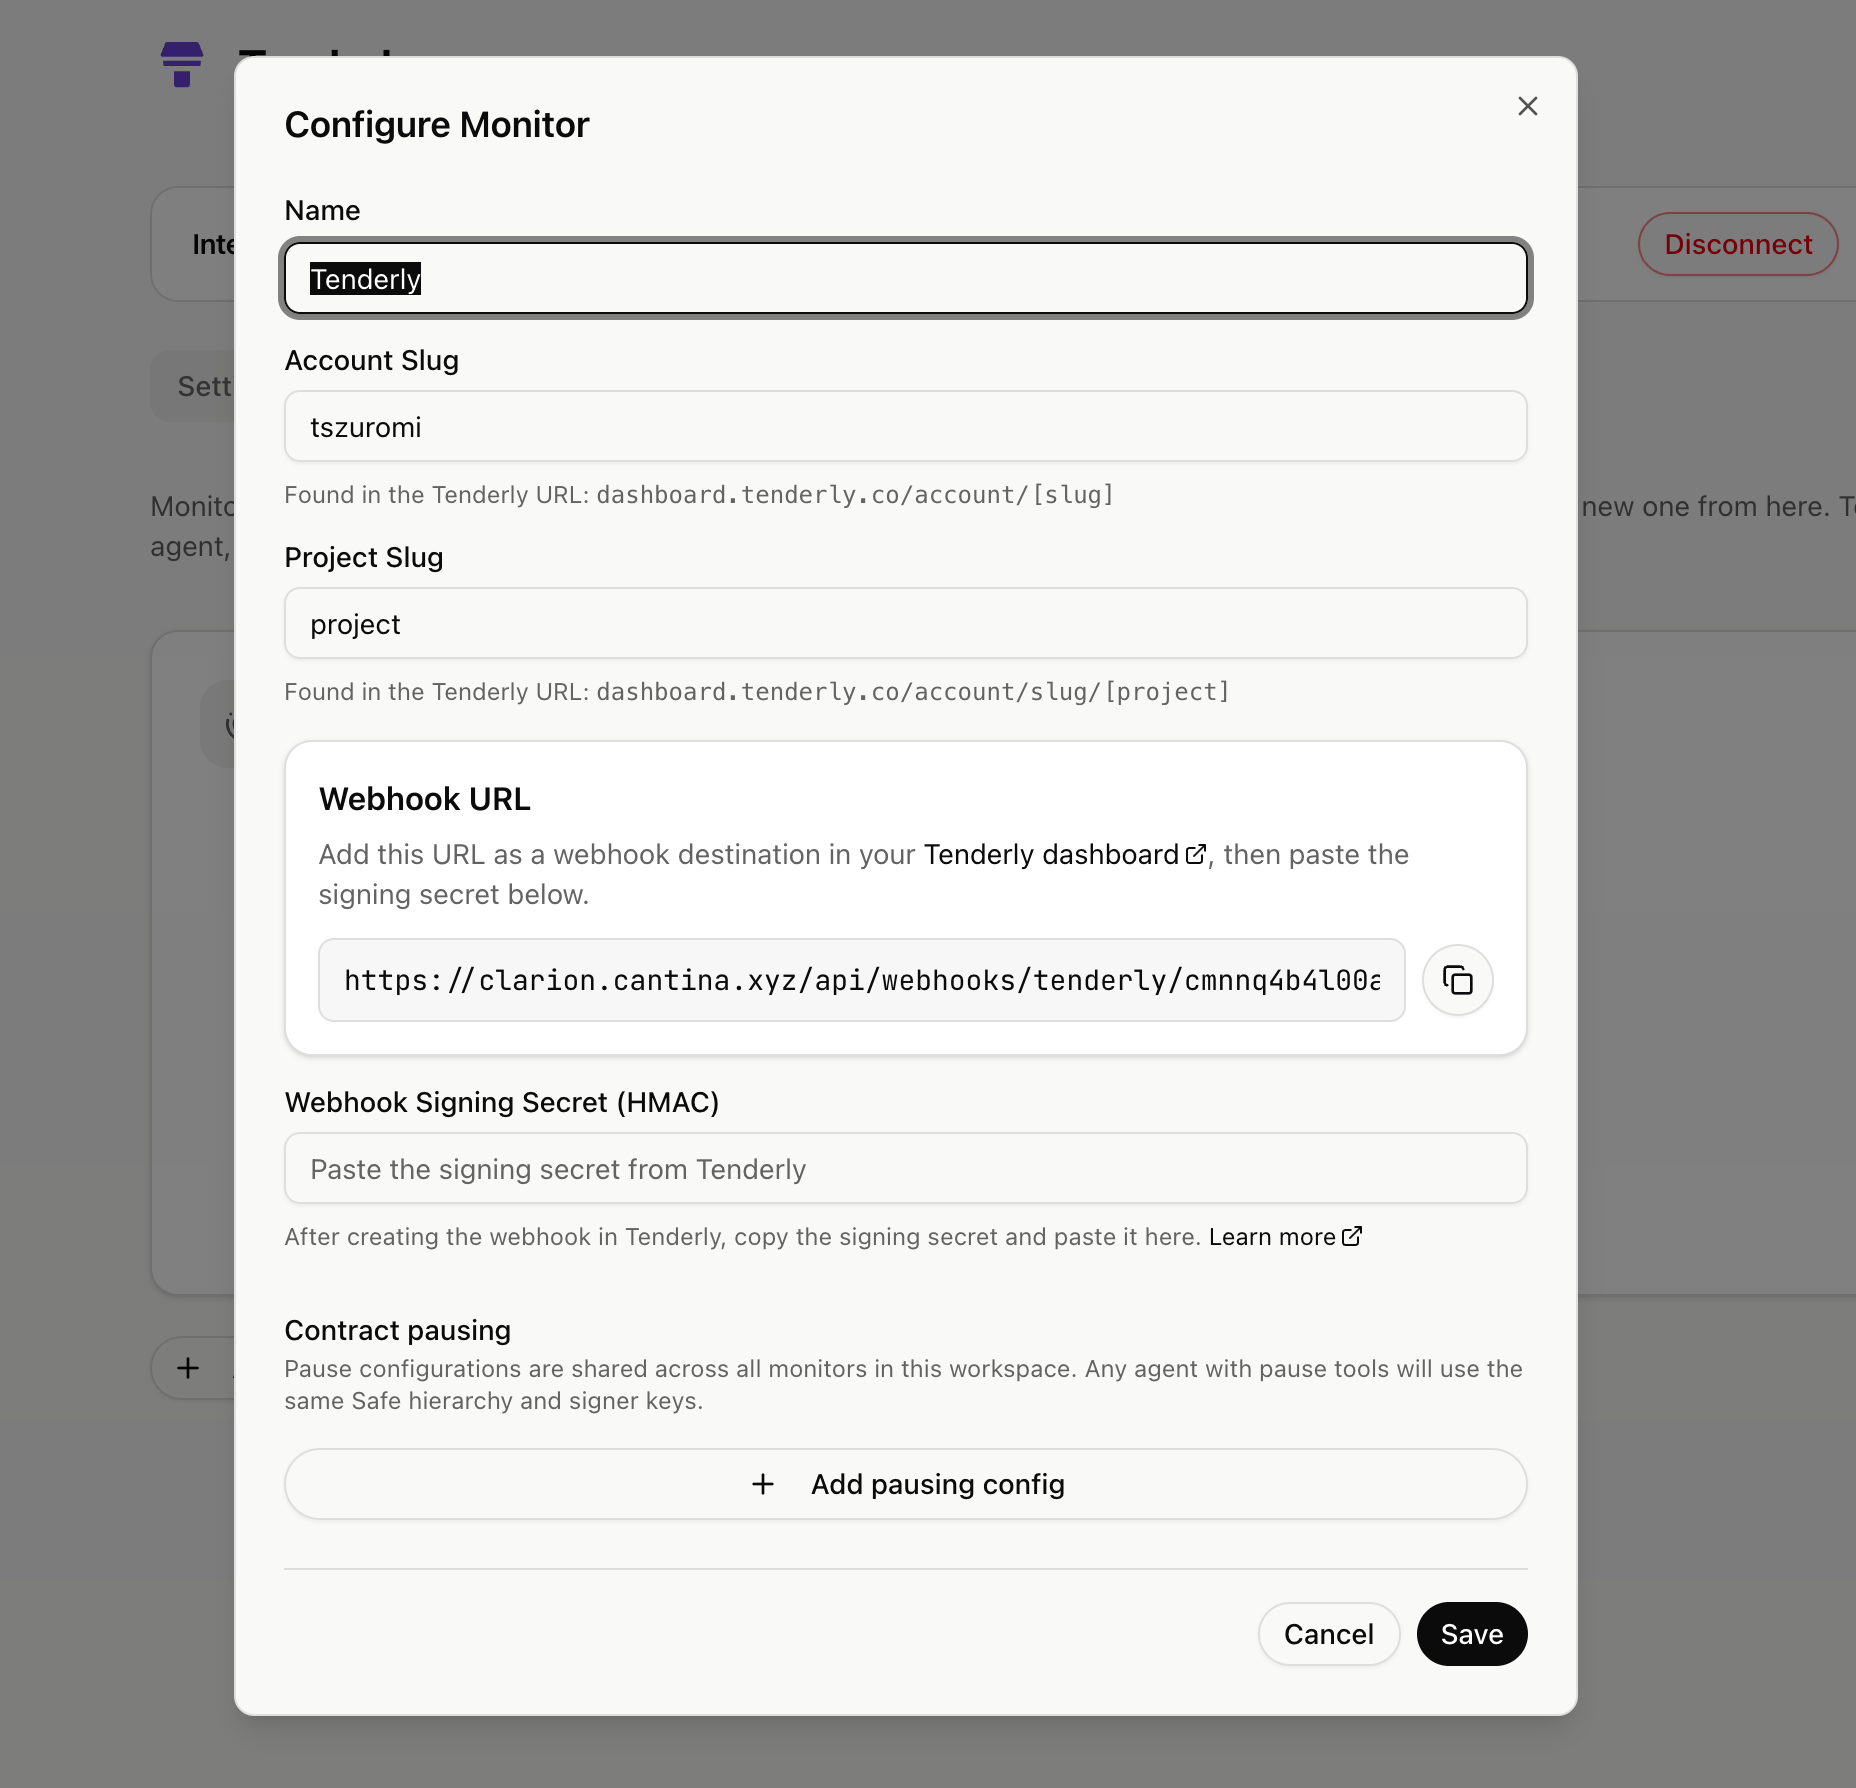 4. Save the monitor.
Your Tenderly monitor is now fully configured and secured with the signing secret.
***
## Step 6 — Attach the Webhook to Your Alerts
1. In Tenderly, go to **Alerts** and review each alert rule that is defined.
2. For every alert you want Clarion to receive, edit the rule and ensure the Clarion webhook is set as a destination.
4. Save the monitor.
Your Tenderly monitor is now fully configured and secured with the signing secret.
***
## Step 6 — Attach the Webhook to Your Alerts
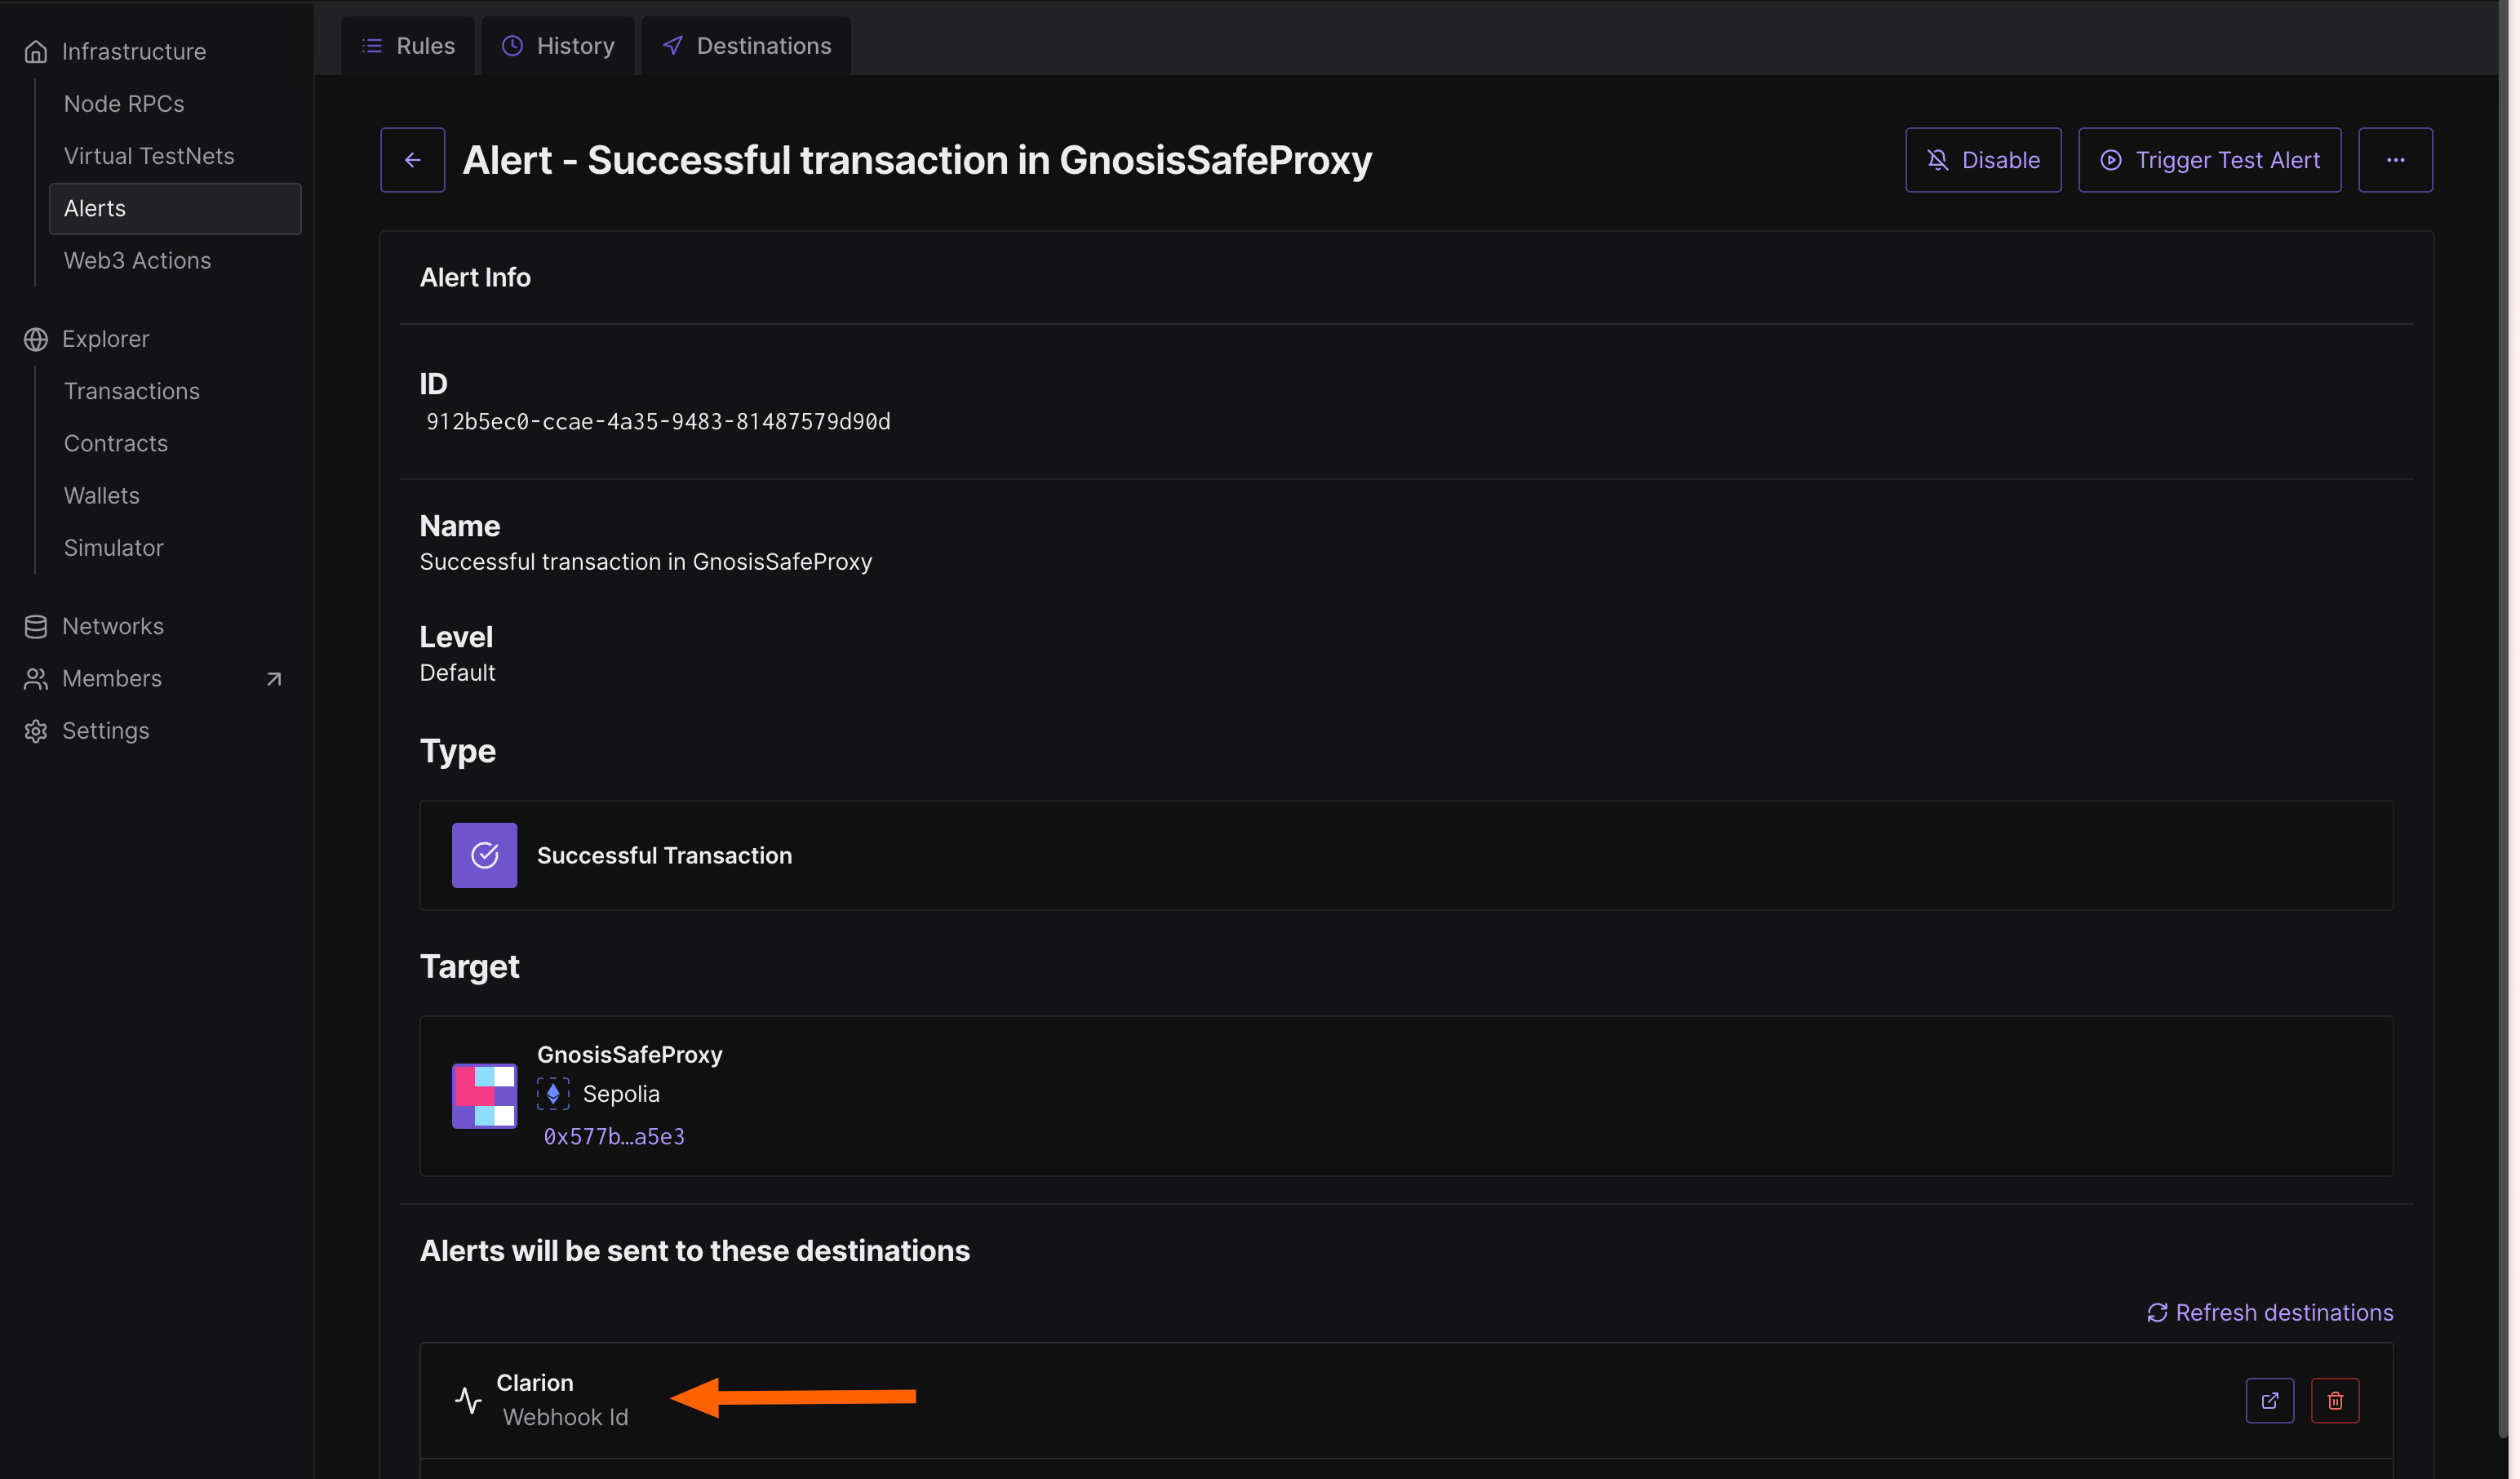
1. In Tenderly, go to **Alerts** and review each alert rule that is defined.
2. For every alert you want Clarion to receive, edit the rule and ensure the Clarion webhook is set as a destination.
 ***
You're done! Clarion is now connected to Tenderly and will receive alerts for all configured monitors.
***
You're done! Clarion is now connected to Tenderly and will receive alerts for all configured monitors.