> ## Documentation Index
> Fetch the complete documentation index at: https://docs.clarion.cantina.xyz/llms.txt
> Use this file to discover all available pages before exploring further.
# Hypernative
> Connect Hypernative to Clarion for on-chain threat monitoring and AI-powered alert triage.
This guide walks you through connecting Hypernative to Clarion. Hypernative monitors on-chain threats and protocol risks — once connected, its alerts flow into Clarion for AI-powered triage and incident response.
**Estimated time:** 5-10 minutes. You will need access to your **Hypernative dashboard** and a **Clarion workspace**.
## Prerequisites
* Access to your **Hypernative dashboard** with permission to manage Actions and Custom Agents
* A **Clarion workspace** with the Hypernative integration available
***
## Step 1 — Generate the webhook URL and header secret in Clarion
1. In Clarion, open the agent that should triage Hypernative alerts
2. Add a **Hypernative** monitor in the agent's **Monitors** section
3. Clarion generates a **webhook URL** and a **Clarion binding header secret** for that monitor
4. Copy both values exactly as shown — you'll need them in the next step
The Clarion binding header secret is shown only during setup or after rotating it. Do not put the secret in the webhook URL.
***
## Step 2 — Create a webhook Action in Hypernative
1. In the Hypernative dashboard, go to **Actions**
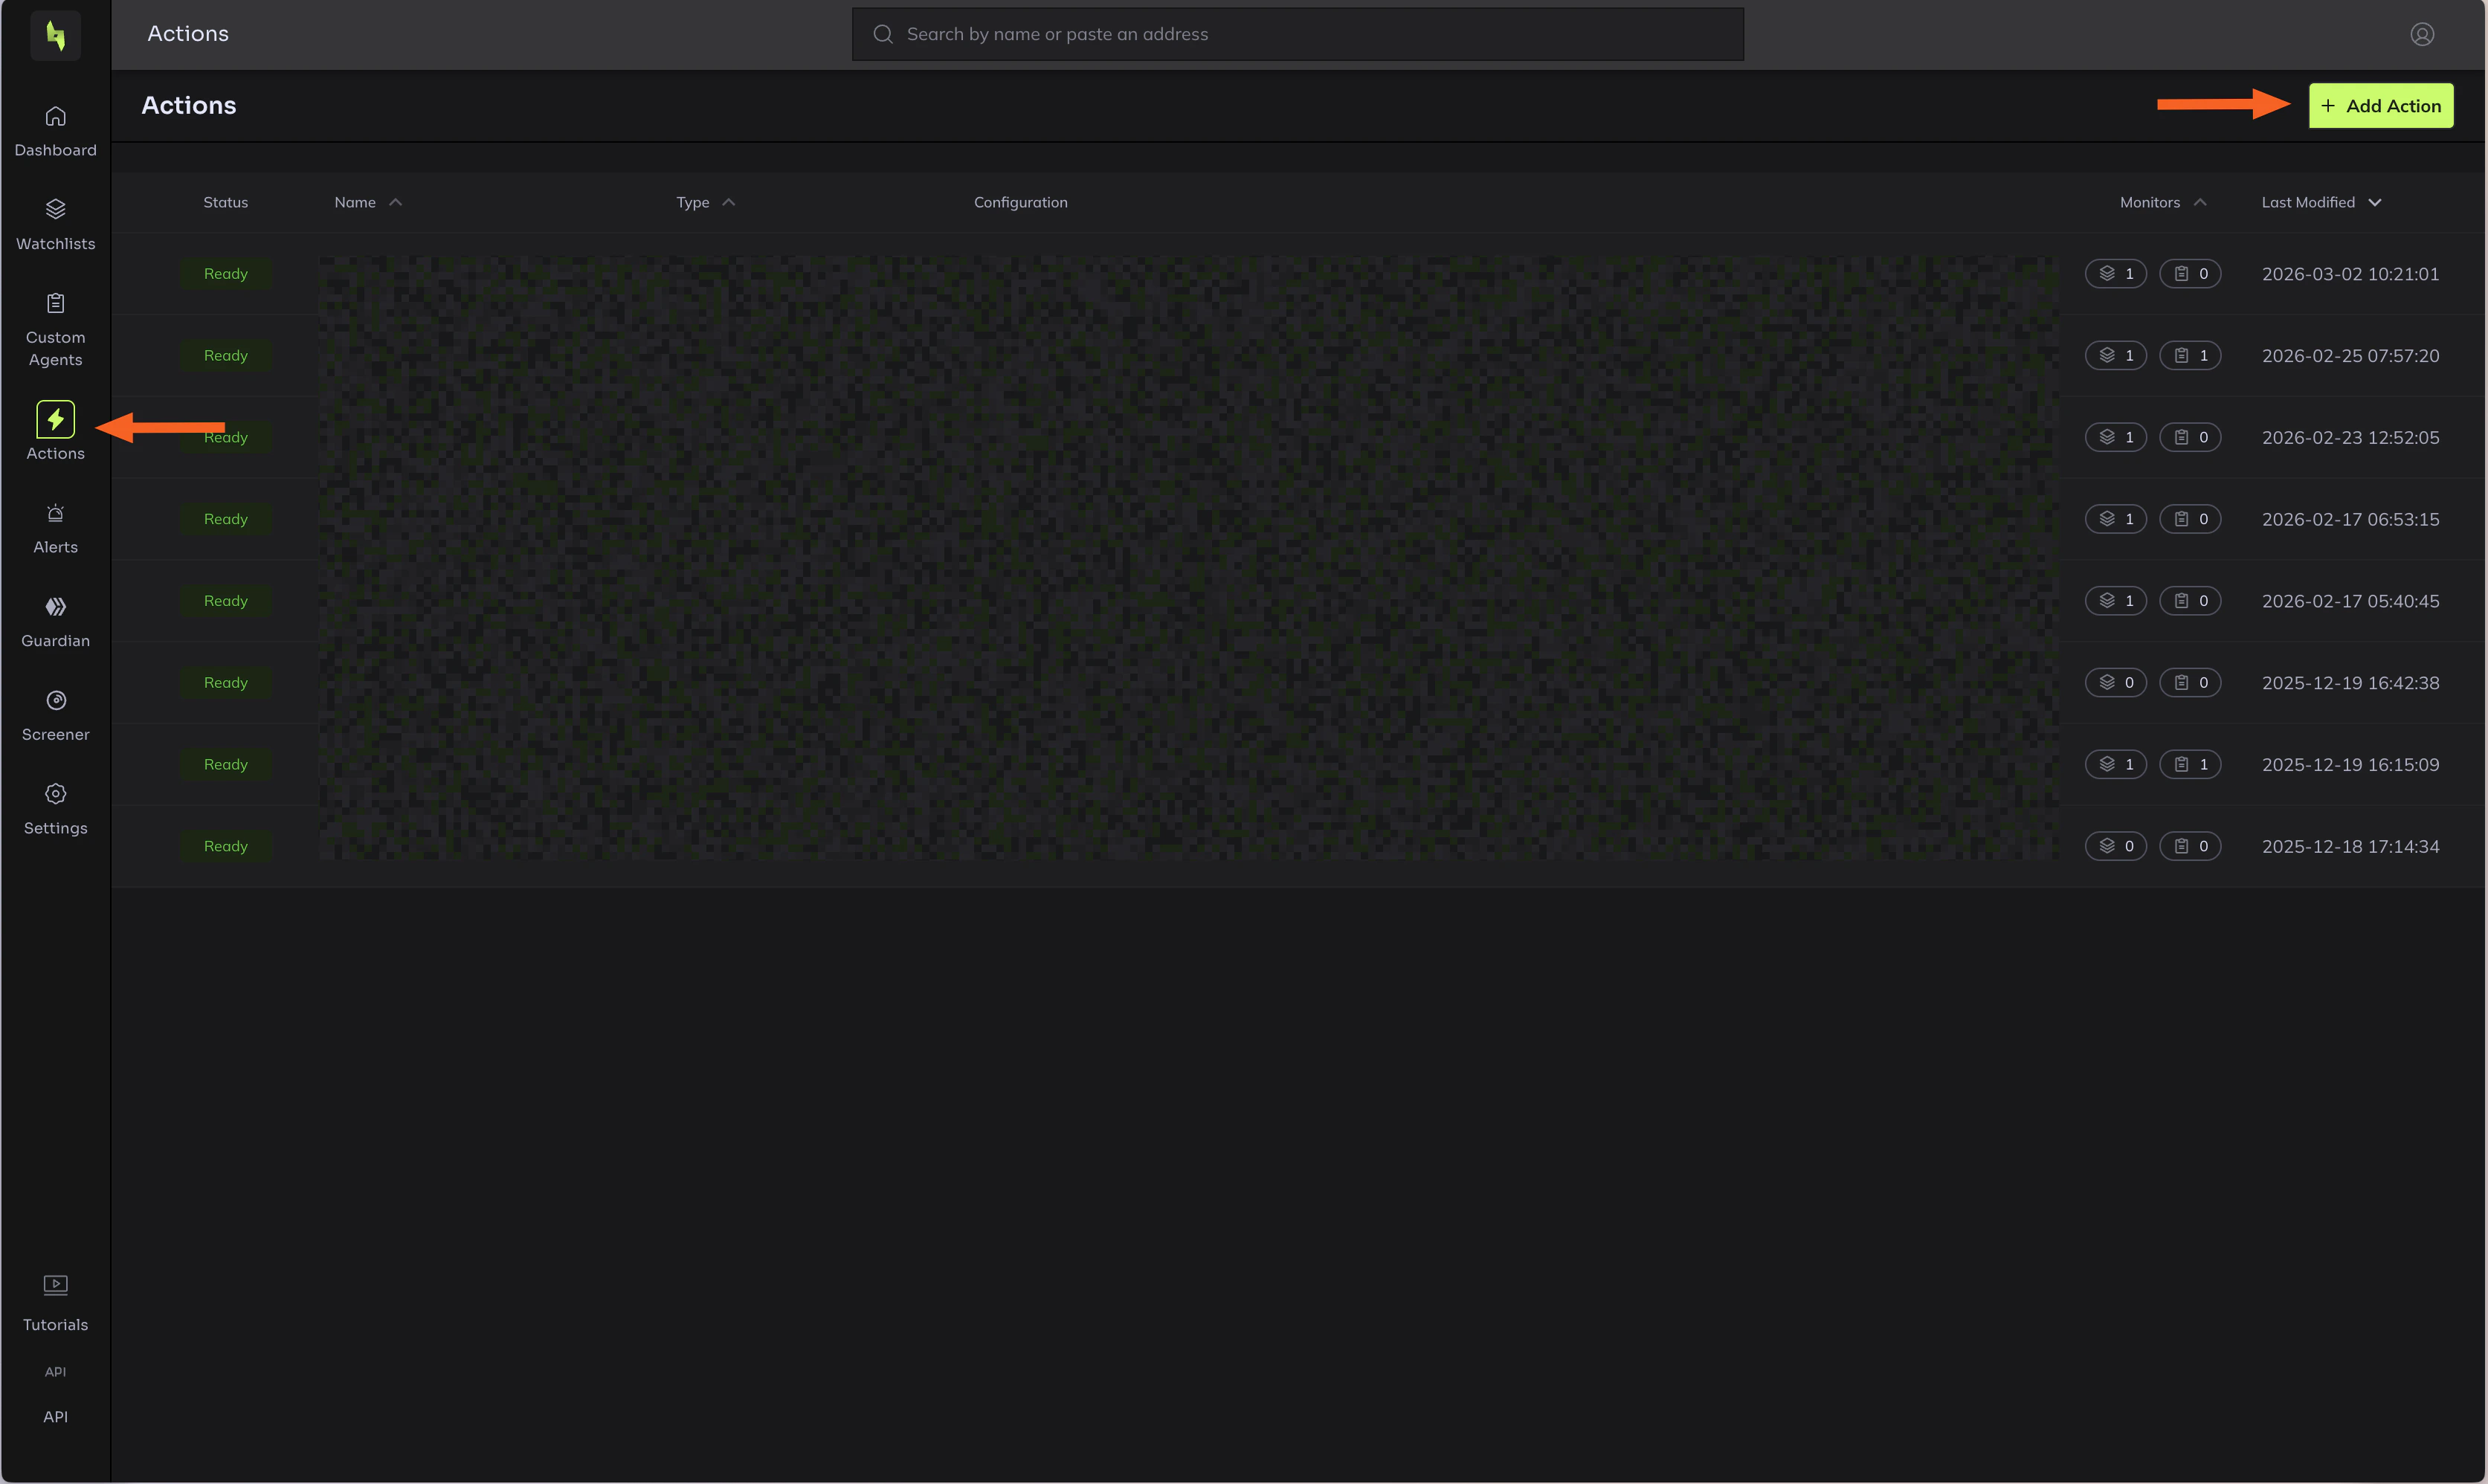 2. Click **Add action**
3. Select **Webhook** as the action type
2. Click **Add action**
3. Select **Webhook** as the action type
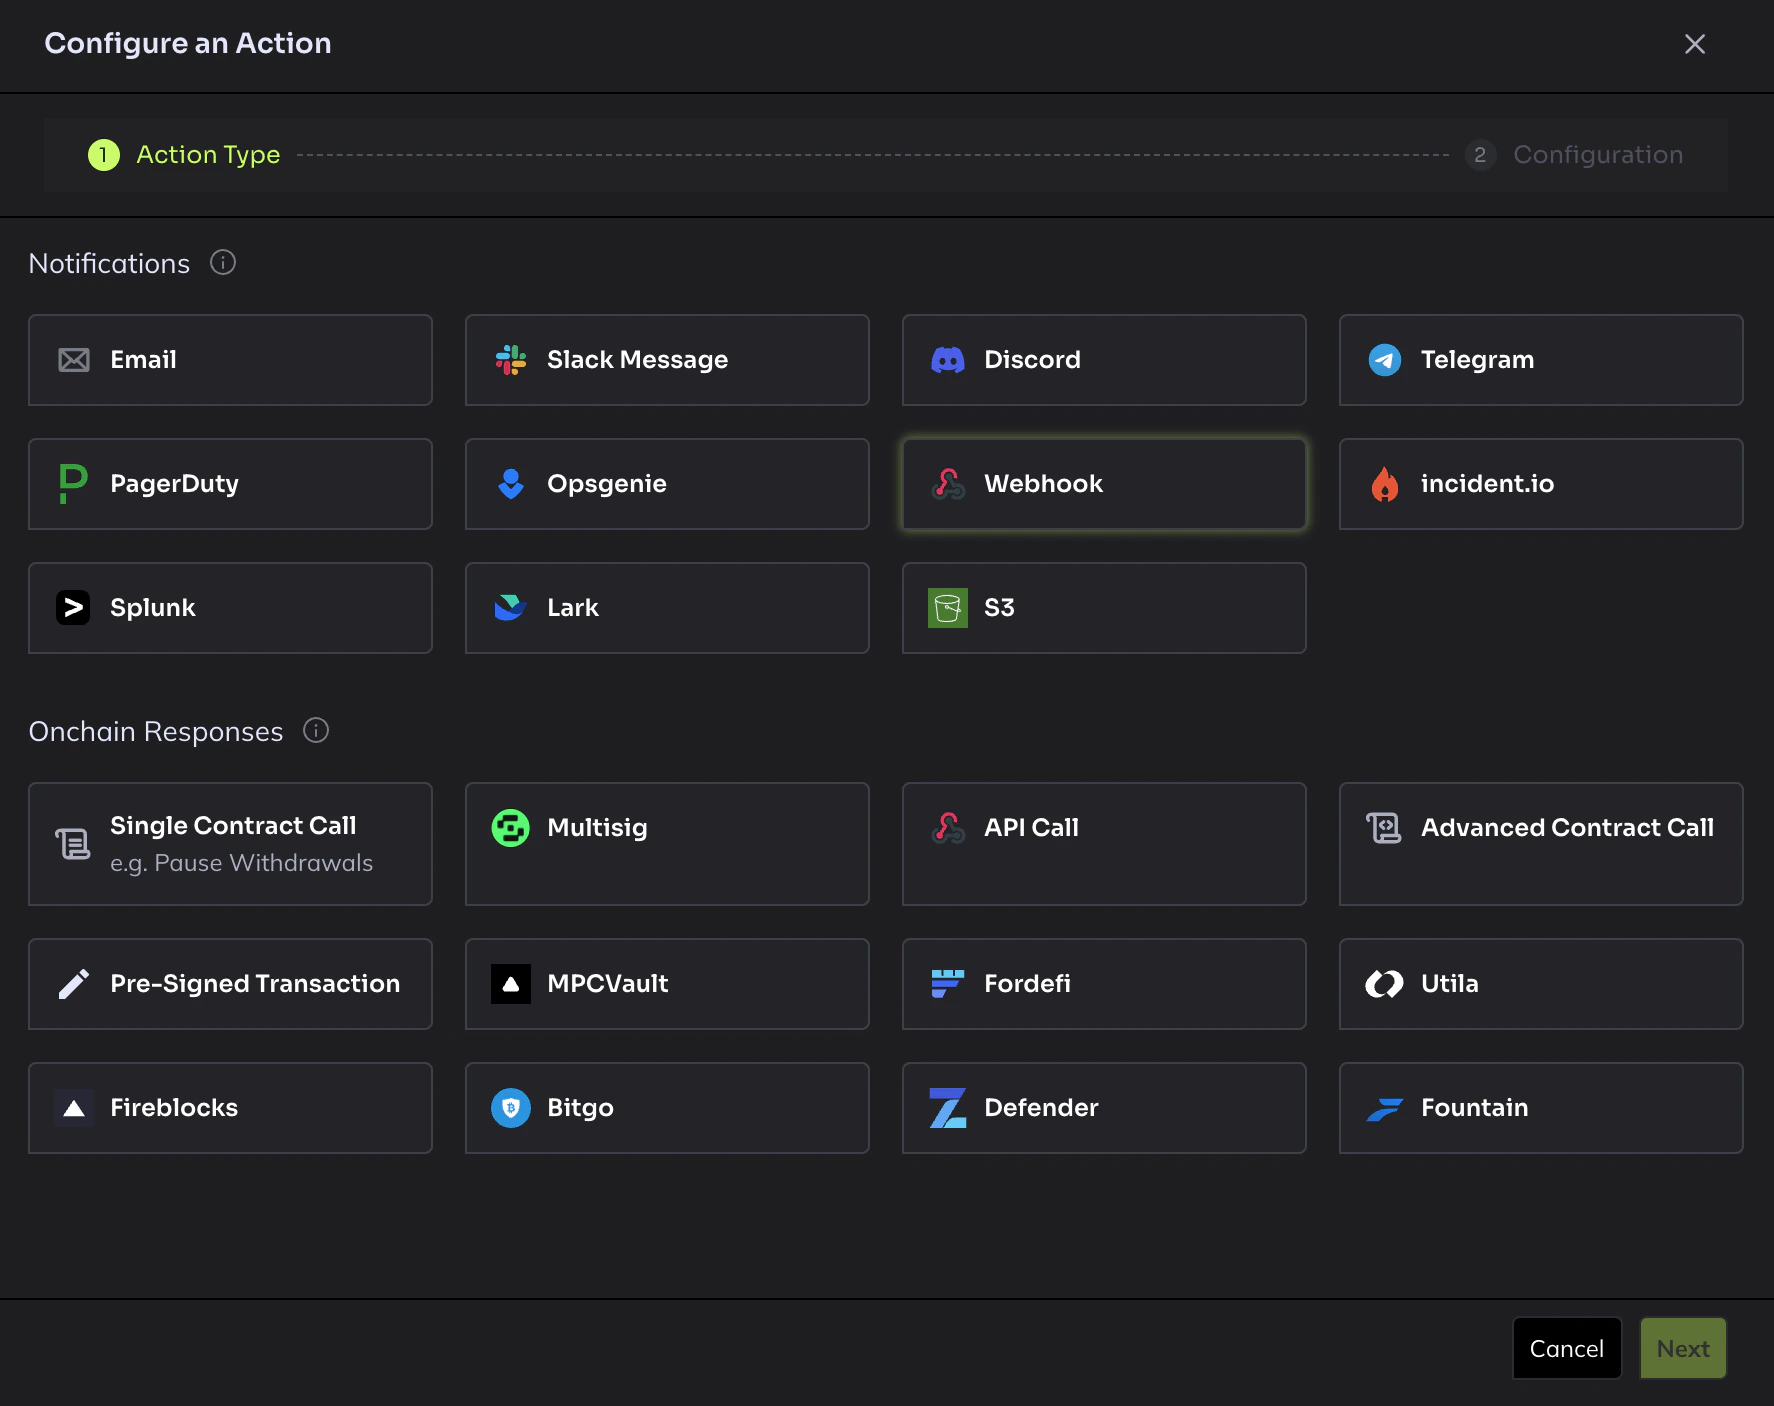 4. Configure the action:
* **Name**: Give it a descriptive name (e.g. `Clarion Webhook`)
* **URL**: Paste the webhook URL from Clarion
* **Request header**: Add `X-Clarion-Webhook-Secret` with the Clarion binding header secret from Clarion
5. Click **Save**
**Important:** Do not use the "Send test alert" button — Hypernative does not send test alerts for webhook action types.
***
## Step 3 — Attach the Action to your Custom Agents
1. In Hypernative, go to **Custom Agents**
2. For each agent you want to send alerts to Clarion, click to edit it
3. Add the newly created webhook Action to the agent's action list
4. Configure the action:
* **Name**: Give it a descriptive name (e.g. `Clarion Webhook`)
* **URL**: Paste the webhook URL from Clarion
* **Request header**: Add `X-Clarion-Webhook-Secret` with the Clarion binding header secret from Clarion
5. Click **Save**
**Important:** Do not use the "Send test alert" button — Hypernative does not send test alerts for webhook action types.
***
## Step 3 — Attach the Action to your Custom Agents
1. In Hypernative, go to **Custom Agents**
2. For each agent you want to send alerts to Clarion, click to edit it
3. Add the newly created webhook Action to the agent's action list
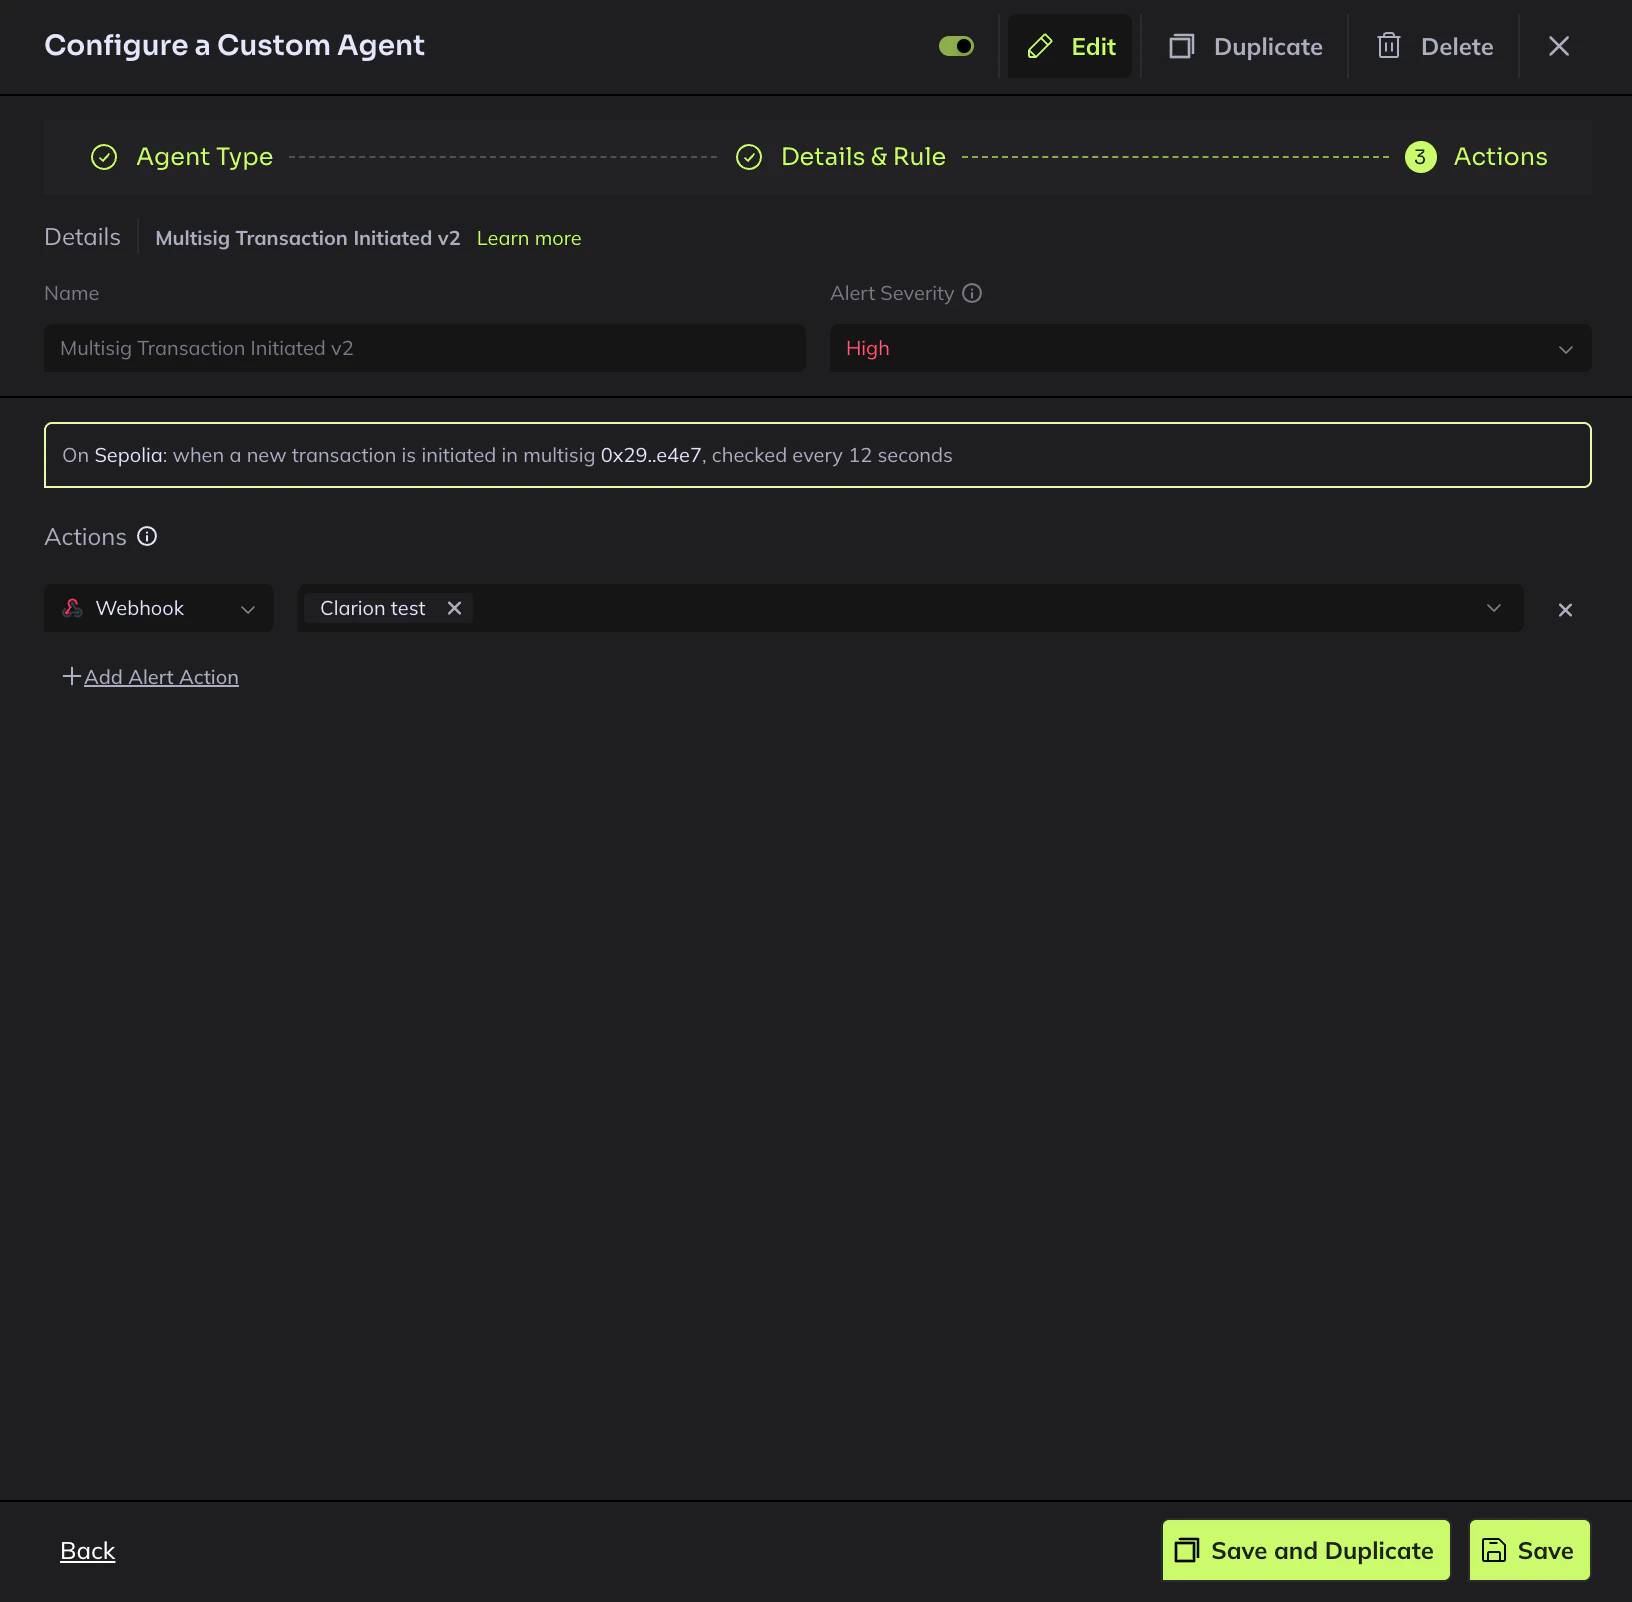 4. Save the agent
Repeat for all agents whose alerts you want Clarion to receive.
***
## Step 4 — Attach the Action to your Watchlists
1. In Hypernative, go to **Watchlists**
2. Open each watchlist and add the Clarion webhook to Actions under the **Configure Alert Policy**
4. Save the agent
Repeat for all agents whose alerts you want Clarion to receive.
***
## Step 4 — Attach the Action to your Watchlists
1. In Hypernative, go to **Watchlists**
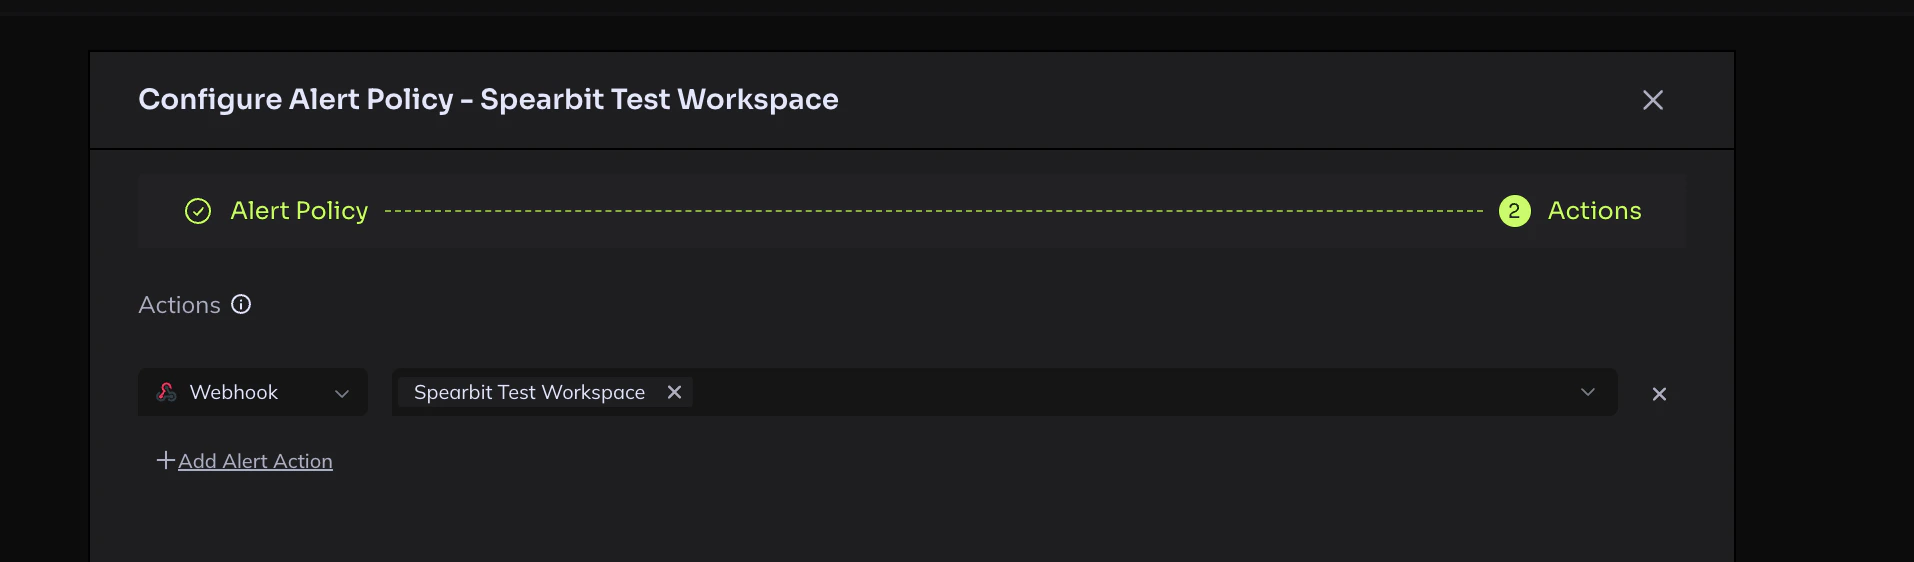
2. Open each watchlist and add the Clarion webhook to Actions under the **Configure Alert Policy**
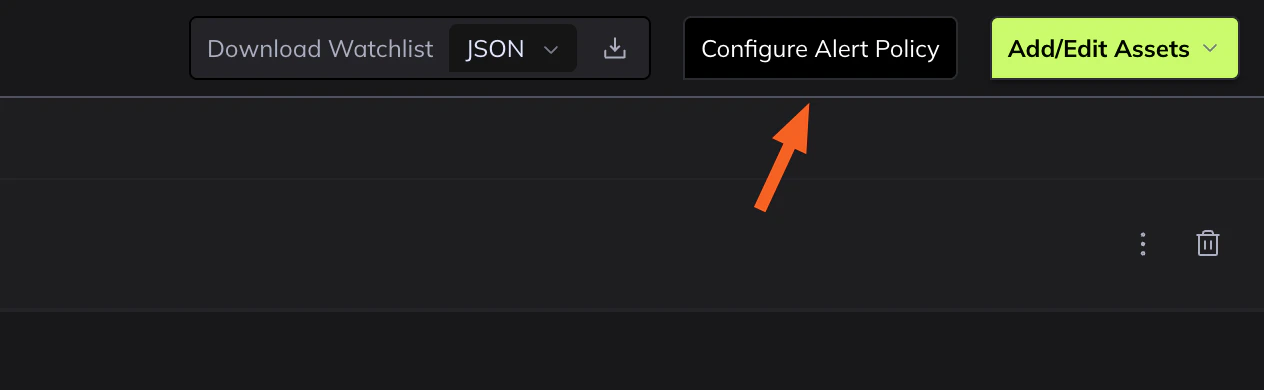 3. Navigate to Actions, and configure the webhook
 ***
## Step 5 — Verify the integration
Since Hypernative doesn't support test webhooks, use **Alert Replay** to verify:
1. Go to **Risk Insights > Alerts** in Hypernative (alternatively you can replay alerts from a Watchlist > Alerts as well)
2. Remove the default date filter to see recent historical alerts
3. Open any recent alert, make sure it was triggered from Watchlists
4. Click **Alert Replay** to re-trigger the alert
***
## Step 5 — Verify the integration
Since Hypernative doesn't support test webhooks, use **Alert Replay** to verify:
1. Go to **Risk Insights > Alerts** in Hypernative (alternatively you can replay alerts from a Watchlist > Alerts as well)
2. Remove the default date filter to see recent historical alerts
3. Open any recent alert, make sure it was triggered from Watchlists
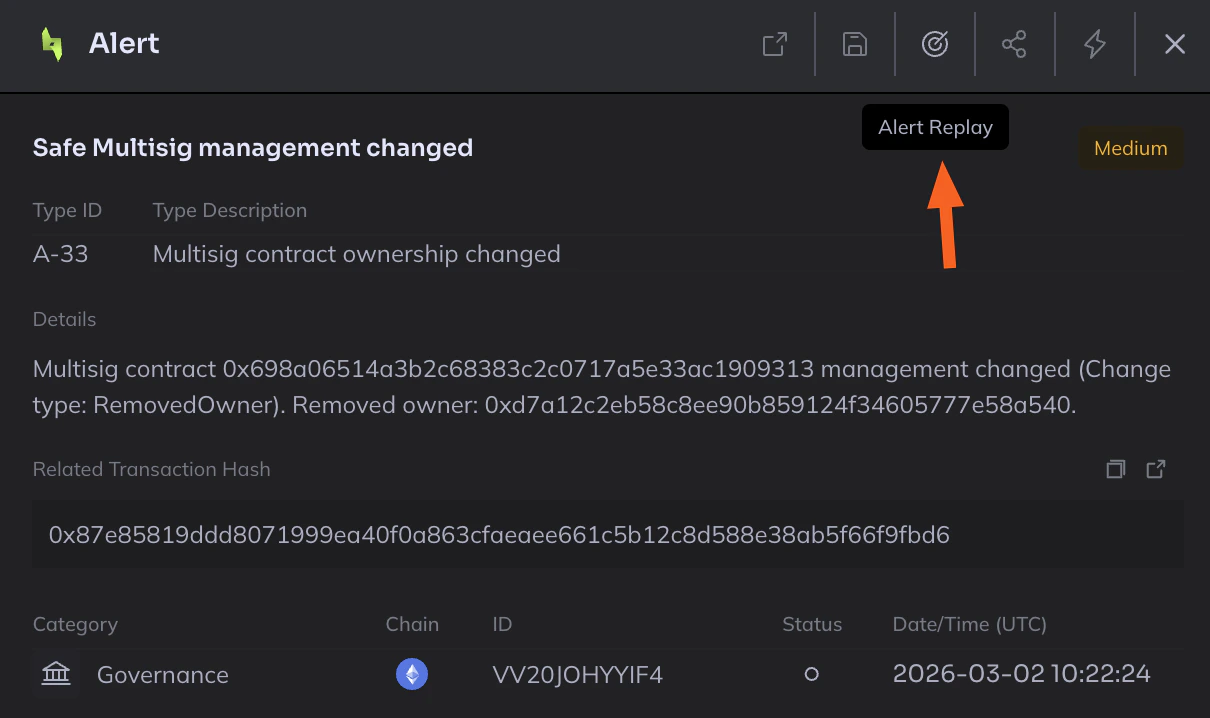
4. Click **Alert Replay** to re-trigger the alert
 **Important:** Alert replay is only available for **Watchlists** and not for **Custom agents**.
**Caution:** Alert Replay triggers the alert across **all** configured action destinations and notification channels — not just Clarion. Make sure you're okay with that before replaying.
5. Check the Clarion alerts page — you should see the replayed alert appear within a few seconds
**Important:** Alert replay is only available for **Watchlists** and not for **Custom agents**.
**Caution:** Alert Replay triggers the alert across **all** configured action destinations and notification channels — not just Clarion. Make sure you're okay with that before replaying.
5. Check the Clarion alerts page — you should see the replayed alert appear within a few seconds