> ## Documentation Index
> Fetch the complete documentation index at: https://docs.clarion.cantina.xyz/llms.txt
> Use this file to discover all available pages before exploring further.
# Guardrail
> Connect Guardrail to Clarion to receive Guard alerts for AI-powered triage and response.
This guide walks you through connecting your Guardrails account to Clarion. The setup involves creating a webhook-based Response Channel in Guardrails and linking it to a Clarion monitor.
**Estimated time:** 5-10 minutes. You will need access to your **Guardrails dashboard** and **Clarion workspace**.
The Clarion integration wizard generates the webhook URL and signing secret for you. Keep the wizard open alongside your Guardrails dashboard.
## Prerequisites
* Access to your **Guardrails** dashboard with permissions to create Response Channels
* A **Clarion workspace** with the Guardrails integration wizard open
***
## Part 1: Create the Webhook Response Channel in Guardrails
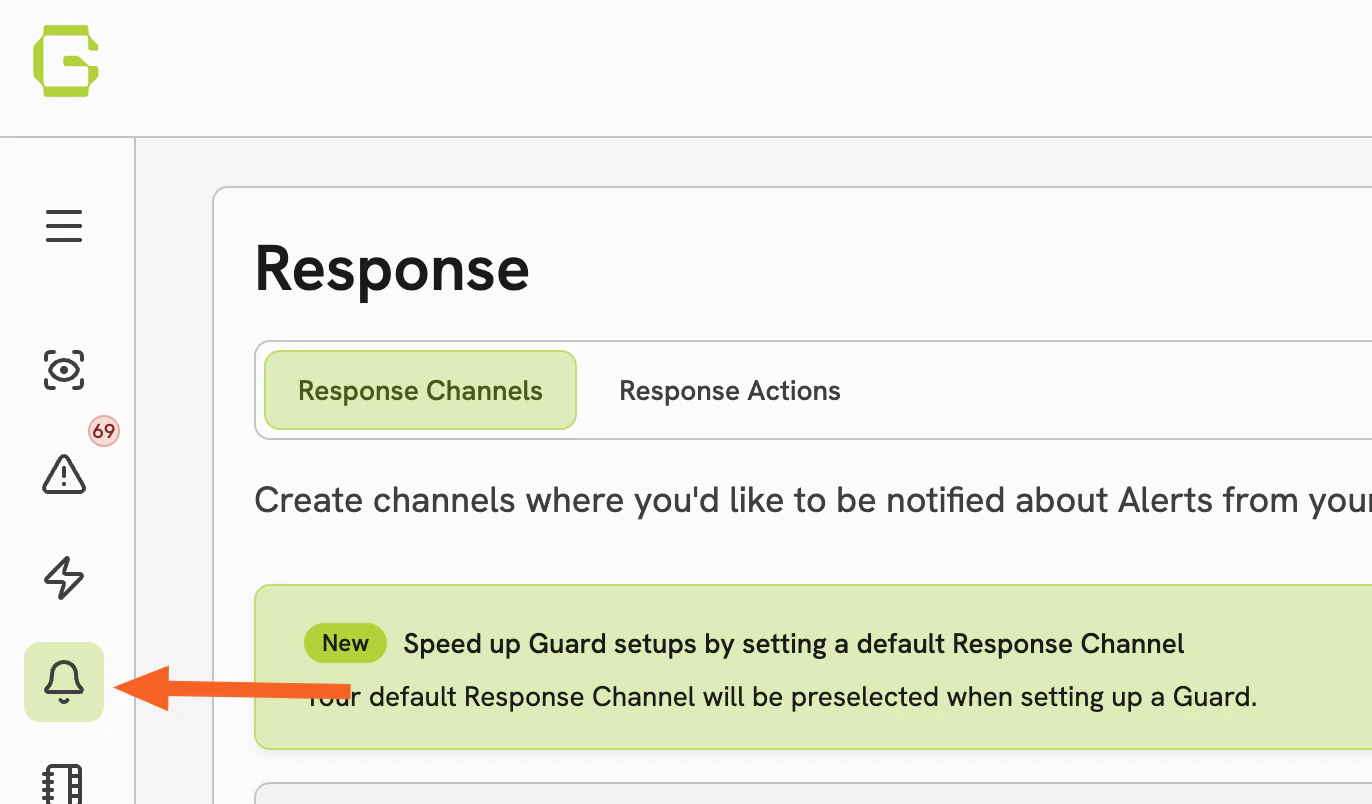
### Step 1 — Open the Responses menu
1. Log in to your **Guardrails** dashboard
2. Open the **Responses** menu and click **Create new response channel**
 ### Step 2 — Select Webhook as the channel type
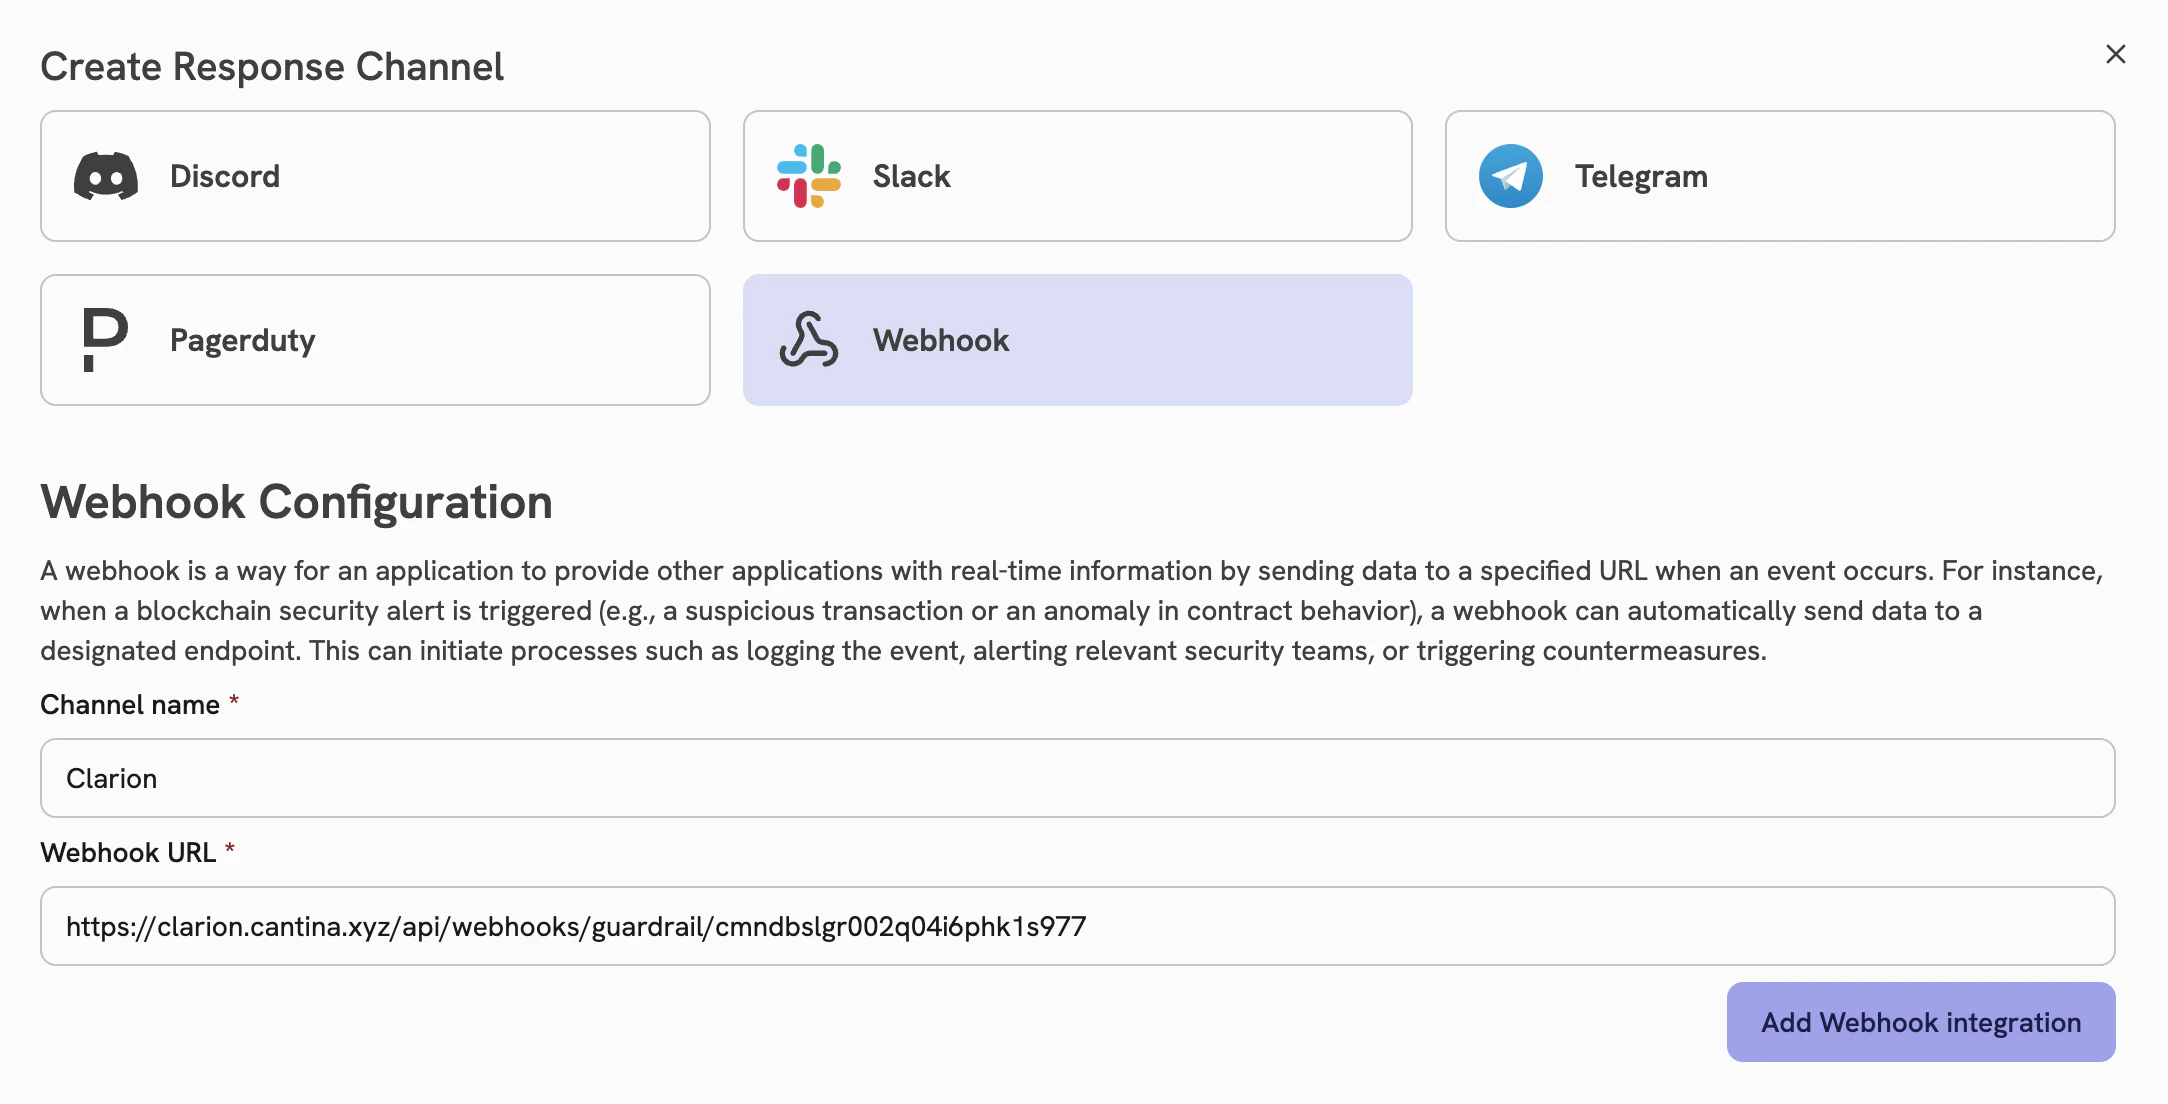
1. Under **Create response channel**, select **Webhook** as the channel type
### Step 2 — Select Webhook as the channel type
1. Under **Create response channel**, select **Webhook** as the channel type
 ***
## Part 2: Configure the Webhook in Clarion
### Step 3 — Create a new monitor in Clarion
1. In Clarion, go to **Integrations**
2. Navigate to **Guardrails** and click **Create a new monitor**
### Step 4 — Connect the webhook URL
1. Copy the **Webhook URL** generated by the Clarion integration wizard
2. In Guardrails, paste this URL into the webhook configuration for your new Response Channel
3. Click **Add webhook integration**
### Step 5 — Add the signing secret
1. In Guardrails, copy the **Signing Secret** displayed after adding the webhook
2. In Clarion, paste this value into the **HMAC Key** field
Make sure you copy the signing secret exactly — this is used to verify that incoming webhooks are authentic.
### Step 6 — Finish creating the Response Channel
1. Complete the remaining fields and save the Response Channel in Guardrails
***
## Part 3: Assign the Response Channel to Your Guards
### Step 7 — Assign to Guards
1. Once the Response Channel is created, click **Assign to Guards**
***
## Part 2: Configure the Webhook in Clarion
### Step 3 — Create a new monitor in Clarion
1. In Clarion, go to **Integrations**
2. Navigate to **Guardrails** and click **Create a new monitor**
### Step 4 — Connect the webhook URL
1. Copy the **Webhook URL** generated by the Clarion integration wizard
2. In Guardrails, paste this URL into the webhook configuration for your new Response Channel
3. Click **Add webhook integration**
### Step 5 — Add the signing secret
1. In Guardrails, copy the **Signing Secret** displayed after adding the webhook
2. In Clarion, paste this value into the **HMAC Key** field
Make sure you copy the signing secret exactly — this is used to verify that incoming webhooks are authentic.
### Step 6 — Finish creating the Response Channel
1. Complete the remaining fields and save the Response Channel in Guardrails
***
## Part 3: Assign the Response Channel to Your Guards
### Step 7 — Assign to Guards
1. Once the Response Channel is created, click **Assign to Guards**
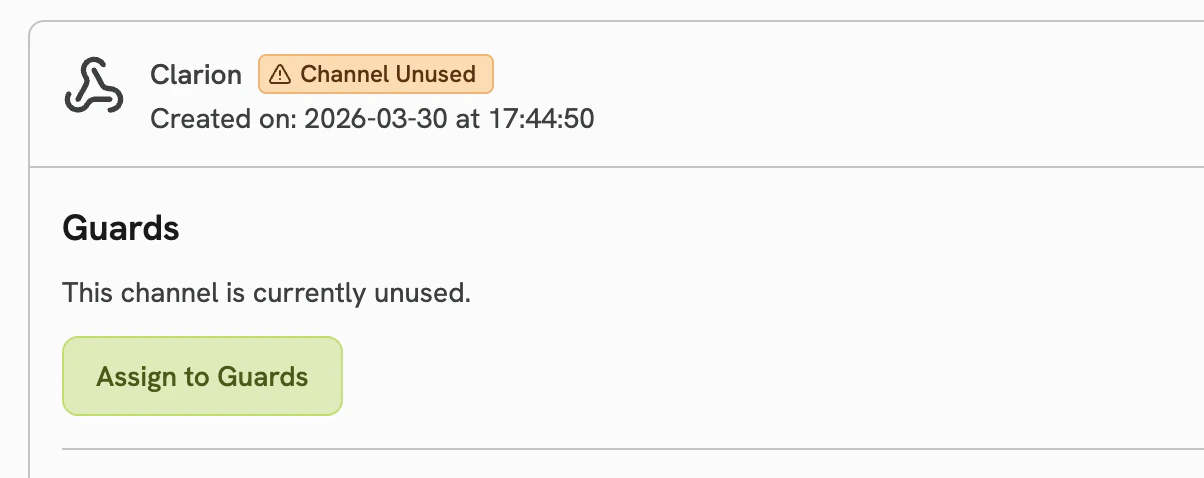 2. From the list, select the Guards you want to send alerts to Clarion for
***
## What happens next
Once configured, Clarion will automatically:
* Receive alerts from Guardrails in real time via the webhook
* Analyze and triage incoming Guard events using AI agents
* Surface actionable insights and recommended responses
2. From the list, select the Guards you want to send alerts to Clarion for
***
## What happens next
Once configured, Clarion will automatically:
* Receive alerts from Guardrails in real time via the webhook
* Analyze and triage incoming Guard events using AI agents
* Surface actionable insights and recommended responses